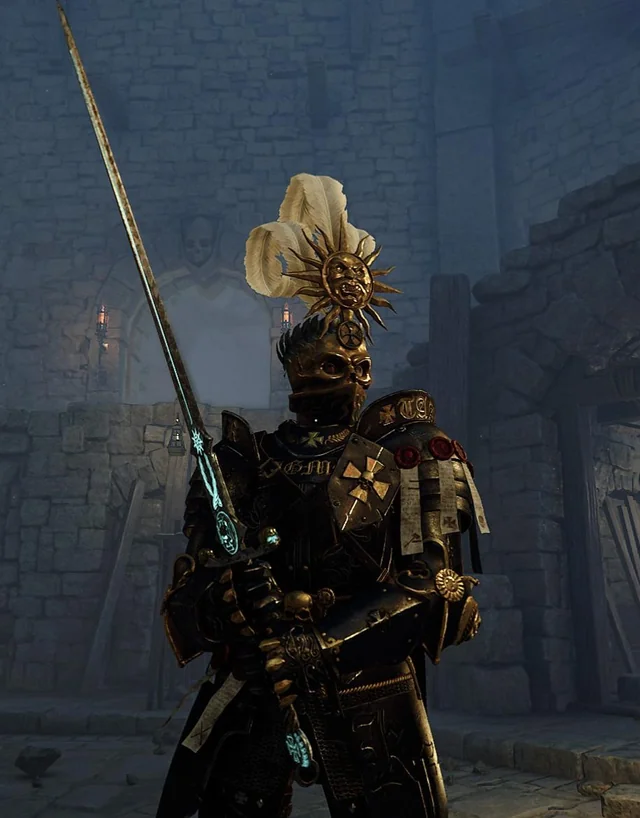
Archetype: Tank
Special Mechanic: Commands
Class Details: Fighters specializing in group support, Knight shout out commands to their allies in the heat of battle. Commands improve the performance of the group for a short period of time, and Knights can have as many as three commands active at any given time.
A single Knight is a potent force indeed, but the Knight of the Blazing Sun truly shines when he is directing a force of allies in the heat of Battle. Knights must carefully watch the ebb of the fight and determine which commands and strategies are best suited for the situation at hand. Rapid reactions and a calm clear mind are the Knights greatest tools, allowing them to bolster their allies in battle while removing any advantage their opponents may have had.
Career Masteries
The Templars of Myrmidia are known for keeping a clear head even in the heat of battle. Capable of quickly assessing the ebb and flow of combat the Knight is a born commander. They stride into battle shoulder to shoulder with their comrades shouting out orders and commands even as they swing their great blades. These Battlefield Commands give their allies a potent advantage, allowing them to swing their blades with great vigor or staunchly hold the line against the most oppressive of foes.
Path of Conquest
Knights who choose the Path of Conquest will become experts at pushing the battle line forward. Their battlefield commands focus on bolstering the fighting strength of their allies to take advantage of their opponents weaknesses. Knights focused on Conquest traditionally forego the use of a sword and shield in favor of the more offensively oriented great sword.
Path of Vigilance
The Path of Vigilance focuses on building a strong defense to cripple opponents and protect allies. Knights choosing this mastery have a variety of commands that will increase their defensive prowess as well as those of nearby allies. This allows them to dig in and hold against almost any assault. Masters of the Path of Vigilance generally choose a stout shield and broadsword combination when defending their allies.
Path of Glory
Knights mastering the Path of Glory excel at inspiring troops to ever greater feats of courage. As such, these Knights can be found almost anywhere on the battlefield leading by example and are a welcome addition to both defensive and offensive maneuvers. Glory can be found regardless of arms and armor, and as such Knights of this mastery can be found wielding either a great sword or sword and shield combination.
Important Stats
As a Knight of the Blazing Sun you will need the following statistics which you can improve using armor sets, weapons, rings, talismans and renown points.
Block: Increases your chance to defend against all attacks with a shield.
Wounds: Increases your overall HP. You can never have enough HP.
Toughness: Reduces damage dealt to you by opponents.
Parry: Increases your chance to defend against melee attacks.
Acquiring Gear
There are many ways to get gear:
- Open RvR: The gear and weapons you get here are for your main spec. When you kill or lock a zone you will be given a number of War Crests according to your level which you can trade for armor and weapons. At the end of a zone if you roll high enough you will be give a color bag with may contain certain tokens that you can trade and get a jewel set. Engineers don’t have defensive jewels set like other classes.
- Scenarios: Scenarios remain a very strong source of gear. You continue to earn War Crests at the end of every scenario, which are then traded with vendors in Altdorf (Order) or the Inevitable City (Destruction) for armor and weapons. The quality of gear from scenarios can still be among the best in the game, making them a crucial part of gearing up.
- Achievements & Tokens: The Tome of Knowledge is still a vital system. By completing achievements (e.g., killing a certain number of creatures, collecting specific items, or exploring areas), you unlock entries in your Tome. These unlocks can reward tokens that are then traded in the library in Altdorf or the Inevitable City for unique jewels or tactics. Some very desirable sets and bonuses can be acquired this way. The development team has continued to add more Tome Achievement Unlocks, including some tied to Live Events as of 2025.
- Tier 4 epic quests: The epic quest lines in each area continue to be a source of significant rewards. Upon completing these lengthy, multi-step quest chains, you are typically given a choice of a powerful item, often with unique appearances or stats. These quests are a reliable way to get high-quality gear.
- Dungeons & Lairs: Dungeons and lairs are still important for acquiring gear, weapons, and jewels, both while leveling up and for end-game progression. The RoR team has been actively updating and even adding new PvE content. For example, as of early 2025, there’s a “Lost Vale” dungeon update introducing new armor sets (Dark Promise sets, including main spec, off-spec, and hybrid options), and materials for crafting permanent rings.
- Ward System: The game utilizes a “Ward” system where you often need to unlock lower-tier Ward sets before being able to equip higher-tier dungeon gear (e.g., Gunbad -> City -> Bastion Stair).
- Public Quests (PQs): While not strictly “dungeons,” PQs are large-scale PvE events that can also provide gear through loot bags. RoR has implemented different difficulties for PQs (Easy, Normal, Hard) which scale with the recommended number of players and offer varying loot quality.
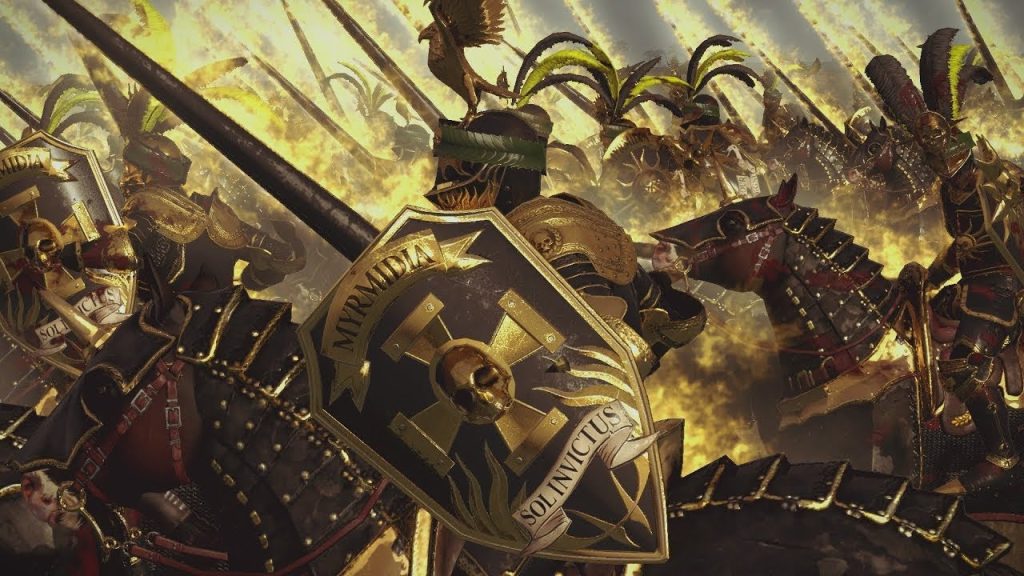
The Knight of the Blazing Sun: Imperial Guardian of the Frontline
The Knight of the Blazing Sun (KotBS) stands as a beacon of Imperial might in Warhammer Online: Return of Reckoning, primarily serving as an AoE buff tank that bolsters entire groups. Its versatile toolkit and group-centric abilities make it an incredibly desirable asset across all scales of Realm vs. Realm (RVR) combat.
RVR Strengths: Leading from the Front
- Ubiquitous Group Support: Unlike the focused protection of some other tanks, the KotBS excels at enhancing the performance of an entire party or warband. Their signature Commands act like powerful auras, providing a variety of short-duration buffs that improve group performance. With the ability to have up to three Commands active simultaneously, a skilled KotBS can significantly boost allies’ damage, defense, or utility, adapting to the ebb and flow of battle. This makes them a highly sought-after tank for any group composition in RVR.
- Versatility in Small-Scale RVR (Duos, 6v6s, Roaming): While renowned for their group buffs, the KotBS also performs admirably in smaller RVR engagements. They possess the fundamental tanking abilities like Guard (absorbing 50% of a guarded ally’s damage) and Guard Switch, allowing them to protect a single high-value target when needed. Combined with their Challenge (50% party damage reduction) and a robust suite of crowd control abilities (Punt, Root, Knockdown), they can effectively control skirmishes and ensure the survivability of their immediate party. A duo with a Warrior Priest is particularly potent, as the KotBS’s group buffs synergize perfectly with the Priest’s healing and offensive capabilities, creating a highly resilient and damaging pair.
- Indispensable in Warbands (24-Man Groups): The KotBS truly shines in large-scale warband RVR. Their AoE buffs are critical for maximizing the effectiveness of an entire 24-man group. Whether in organized guilds or random pick-up groups (PUGs), a KotBS is always a welcome sight on the frontline. They provide sustained enhancements that can turn the tide of a large engagement, ensuring the warband hits harder, takes less damage, and maintains crucial momentum during pushes or defenses. Their ability to manage multiple Commands simultaneously allows them to fine-tune the warband’s performance on the fly, responding to immediate threats or opportunities.
Core Mechanics in RVR: Commands and Action Points
- Commands: The heart of the KotBS’s RVR identity lies in their Commands. These aren’t just passive buffs; they require active management and strategic application. A good KotBS understands when to activate specific Commands to counter enemy threats or amplify allied strengths. This active engagement with their buffing mechanics makes them a dynamic and rewarding class to master.
- Action Point (AP) Mechanism: The KotBS’s AP mechanism makes them an accessible tank to learn. This straightforward resource system allows players to consistently utilize their abilities without complex management, enabling them to focus more on battlefield awareness and positioning.
The Hybrid Playstyle: Two-Handed KotBS in RVR
- Even when opting for a 2-handed “DPS” setup, the KotBS never loses their fundamental “protector” role in RVR. All their critical tank utility skills, including Guard and their invaluable Commands, remain fully functional. While their damage output is decent, it’s the combination of their offensive presence with their sustained group support and crowd control that makes the 2-handed KotBS a formidable hybrid in RVR, allowing them to contribute both to the warband’s damage and its overall resilience.
In summary, the Knight of the Blazing Sun is the ultimate support tank in Warhammer Online: Return of Reckoning. Their broad-reaching AoE buffs, combined with core tanking utilities and effective crowd control, make them an essential component for any RVR group, from small skirmishes to massive warband clashes. Their presence on the battlefield ensures allies are constantly empowered, making them a truly indispensable Imperial guardian.
Warhammer Online: Return of Reckoning (RoR) offers a classic RvR (Realm vs. Realm) experience, and playing a tank effectively is crucial to your realm’s success. Tanks are the backbone of any group, soaking up damage, controlling the battlefield, and protecting their squishier allies. Here’s a guide to mastering the tank role in RoR:
The Core Philosophy of a RoR Tank
Unlike many modern MMOs where tanks primarily hold aggro through damage, RoR tanks excel at:
- Damage Mitigation: Directly reducing incoming damage to themselves and, more importantly, their allies.
- Crowd Control (CC): Disrupting enemy formations, preventing damage, and setting up kills for their DPS.
- Debuffing: Weakening enemies to make them easier for your allies to kill.
- Peeling: Protecting your healers and ranged DPS from enemy threats.
Essential Tank Skills and Their Usage
While specific skill names and effects vary slightly between the different tank careers (Knight of the Blazing Sun, Ironbreaker, Swordmaster for Order; Chosen, Black Orc, Black Guard for Destruction), the core mechanics and their application are similar.
1. Guard (Core Tank Mechanic)
- What it does: Guard is arguably the most important tank ability. When active on a groupmate within 30 feet, it transfers 50% of the damage they take and 35% of the hate they generate (in PvE) onto you.
- When it’s used:
- Always be guarding someone! This is non-negotiable. Your primary goal is to keep your squishier allies alive.
- Prioritize high-value targets: Generally, this means your healers first, then your high-DPS allies (especially ranged or caster DPS who are often targeted).
- Situational Switching:
- Emergency Peeling: If an enemy DPS suddenly switches onto one of your squishy allies who is taking heavy damage, quickly switch your Guard to them to absorb a significant portion of that damage.
- Focus Fire: If your group is trying to burn down a specific enemy, Guard the allied DPS who is focusing that target. This allows them to stay aggressive without fear of being instantly burst down.
- Objective Play: When guarding a flag or an important objective, you might guard a backline DPS or healer who is holding the point while you physically block incoming enemies.
- Example: Your Bright Wizard (BW) is getting focused by a Marauder and a Witch Elf. Your healer is busy healing the frontline. You immediately Guard the BW. Now, half the damage they take is transferred to you, allowing your healer to catch up or giving the BW a crucial window to escape or retaliate.
2. Taunts & Challenges (Threat & Damage Mitigation)
- Taunt (Single Target):
- What it does: Forces a single enemy to attack you and, in RoR, often increases the damage you deal to them for a short duration. It also interrupts currently building abilities.
- When it’s used:
- PvE Threat Management: In dungeons and open-world PvE, this is your primary way to keep a specific mob on you.
- PvP Interrupt & Focus: Use it on an enemy healer to interrupt a heal, or on a high-damage enemy to direct their attacks onto you, taking pressure off your allies. It can also be used to increase your damage output on a key target for your group to burst down.
- Challenge (AoE):
- What it does: Forces multiple enemies in front of you to attack you and reduces the damage they deal to anyone other than you.
- When it’s used:
- Frontline Engagements: In large-scale RvR (Realm vs. Realm) battles or scenarios, use Challenge when you’re engaging a group of enemies to reduce their overall damage output on your team. Tanks will often rotate their Challenges to keep enemies consistently under this effect.
- Objective Defense: When defending a keep door or a tight choke point, using Challenge on cooldown can significantly reduce incoming damage to your entire group.
- Example (PvP): A large enemy warband is pushing your keep door. As the primary tank, you charge in, hit your AoE Challenge, and then follow up with your single-target Taunt on their most dangerous melee DPS. This pulls their focus and reduces their damage on your squishy backline trying to hold the door.
3. Knockbacks & Knockdowns (Crowd Control)
- What they do: These abilities forcefully displace enemies, interrupting casts, creating space, and sometimes stunning them momentarily.
- When they’re used:
- Peeling: This is a crucial peeling tool. If an enemy melee DPS is on your healer, use a knockback to send them flying, giving your healer precious time to reposition or heal themselves.
- Environmental Kills: RoR has many ledges and cliffs. Punting an enemy off a cliff for an instant kill is incredibly satisfying and effective.
- Interrupting Important Casts: While Taunt can interrupt, a well-timed knockback can disrupt a critical channeled ability or powerful cast from an enemy.
- Isolating Targets: Knocking an enemy tank away from their guarded target can create a window for your DPS to quickly burst down a squishy enemy.
- Example: You see an enemy Bright Wizard starting to cast a powerful AoE nuke. You quickly use your knockback ability to send them flying, interrupting their cast and potentially saving your group from massive damage.
4. Defensive Buffs (Self & Group Survival)
- What they do: These skills vary by tank class but typically involve increasing your armor, resistances, parry/block/disrupt chances, or granting temporary invulnerabilities. Some also provide group-wide defensive bonuses.
- When they’re used:
- Anticipate Burst: Use your defensive cooldowns before you take heavy damage, not after. If you see an enemy group focusing you, pop your defensive buffs.
- Mitigate AoE Damage: Abilities like the Knight of the Blazing Sun’s “Hold the Line!” increase dodge and disrupt for allies behind you, making them excellent for defending against ranged and magical attacks in group engagements.
- Objective Holding: When defending a flag or a bottleneck, using your group defensive buffs can make your team significantly tougher to dislodge.
- Example: You’re leading a charge into a crowded area in RvR. You anticipate incoming ranged and magic damage, so you activate a defensive buff like “Hold the Line!” (if you’re a KotBS) to bolster your allies’ defenses as you push in.
5. Debuffs (Weakening Enemies)
- What they do: Tanks often have abilities that reduce enemy armor, damage, healing received, or apply snares/roots.
- When they’re used:
- Focus Fire Enhancement: Apply armor or resistance debuffs to the enemy target your group is focusing, helping your DPS melt them faster.
- Controlling Movement: Snares and roots are excellent for preventing enemies from escaping or reaching your backline.
- Damage Reduction: Debuffs that reduce enemy damage output can significantly ease the burden on your healers.
- Example: You’ve successfully taunted and guarded your healer, drawing the attention of an enemy Chosen. You then apply an armor debuff to the Chosen, allowing your allied DPS to chew through their defenses more effectively. If the Chosen tries to run, you follow up with a snare to keep them in range.
General Tanking Principles
- Map Awareness: Always be aware of your surroundings, where your allies are, and where the enemy threats are coming from. This dictates who you Guard, who you CC, and where you position yourself.
- Positioning is Key:
- Protect the Backline: Position yourself between your healers/ranged DPS and the incoming enemy threats. Be a physical barrier.
- Control Choke Points: Tanks excel at holding narrow passages or doorways, preventing enemy pushes.
- Initiate & Absorb: Be the first one into a fight to absorb the initial burst and draw aggro.
- Communication: Call out targets, communicate your cool downs, and inform your healers if you’re taking heavy damage.
- Adaptability: No two fights are exactly alike. Be prepared to switch your Guard target, adjust your positioning, and prioritize different CC based on the flow of battle.
- Renown Skills: Invest your Renown points wisely into defensive stats like Toughness, Wounds, and parry/block/disrupt. Renown abilities like “Stand Your Ground” (increased incoming healing) or “Juggernaut” (temporary CC immunity) are incredibly valuable.
- Potions: Always carry healing and defensive potions. They can provide a crucial burst of survivability in dire situations.
By understanding and effectively utilizing these core skills and principles, you’ll be well on your way to becoming an invaluable tank in Warhammer Online: Return of Reckoning, leading your realm to victory on the battlefield!
Pre Best in Slot Gear (Shield)
|
|||
| Helmet: | Redeye Set | ||
| Shoulders: | Redeye Set | ||
| Cloak: | Redeye Set | ||
| Chest: | Redeye Set | ||
| Belt: | Vanquisher Set | ||
| Gloves: | Vanquisher Set | ||
| Boots: | Vanquisher Set | ||
| Mainhand: | Sentry’s Swrd of Glory | ||
| Offhand: | War Crest Vendor with Shieldberer’s prefix | ||
| Jewelry Slot 1: | Rough Gunbad Diamond | ||
| Jewelry Slot 2: | Rough Gunbad Ruby | ||
| Jewelry Slot 3: | Rough Gunbad Amber | ||
| Jewelry Slot 4: | Sentinel Knightseal & (+6% Block) | ||
| Talisman: | Initiative & Wounds | ||
Best in Slot Gear (Shield)
|
|||
| Helmet: | Sovereigh Set | ||
| Shoulders: | Sovereigh Set | ||
| Cloak: | Sovereigh Set | ||
| Chest: | Sovereigh Set | ||
| Belt: | Sovereigh Set | ||
| Gloves: | Sovereigh Set | ||
| Boots: | Sovereigh Set | ||
| Mainhand: | Fortress Longsword | ||
| Offhand: | Shieldbearer’s Heater of Reverence | ||
| Jewelry Slot 1: | Rough Gunbad Diamond | ||
| Jewelry Slot 2: | Rough Gunbad Ruby | ||
| Jewelry Slot 3: | Sentinel Knightseal & (+6% Block) | ||
| Jewelry Slot 4: | Sovereign Seal of the savior | ||
| Talisman: | Initiative & Wounds | ||
Pre Best in Slot Gear (2 Handed)
|
|||
| Helmet: | Beastlord Set | ||
| Shoulders: | Beastlord Set | ||
| Cloak: | Ravack’s Cloak | ||
| Chest: | Beastlord Set | ||
| Belt: | Anything with Parry | ||
| Gloves: | Redeye Set | ||
| Boots: | Redeye Set | ||
| Mainhand: | War Crest Vendor – Sentry’s Prefix | ||
| Offhand: | |||
| Jewelry Slot 1: | Genesis Fragment of the Undying | ||
| Jewelry Slot 2: |
|
||
| Jewelry Slot 3: | Beastlord Set & Pocket | ||
| Jewelry Slot 4: | Rough Gunbad Ruby | ||
| Talisman: | Initiative & Wounds | ||
Best in Slot Gear (2 Handed)
|
|||
| Helmet: | Victorious Set | ||
| Shoulders: | Bloodlord Set | ||
| Cloak: | Victorious Set | ||
| Chest: | Triumphant Set | ||
| Belt: | Bloodlord Set | ||
| Gloves: | Triumphant Set | ||
| Boots: | Warlord Set | ||
| Mainhand: | Nightless | ||
| Offhand: | |||
| Jewelry Slot 1: | Genesis Fragment of the Undying | ||
| Jewelry Slot 2: | Genesis Fragment of the Warrior | ||
| Jewelry Slot 3: | Sentinel Ring &(+6% Parry) or Triumphant Set | ||
| Jewelry Slot 4: | Amethyst Annulus or Rough Gunbad Ruby | ||
| Talisman: | Initiative & Wounds | ||
Builds are based on Uchoo’s Guide
KOTBS Shield Build
Spent you ability points as shown below: Path of Conquest 6 points / Path of Vigilance 17 Points / Path of Glory 8 Points Pick the following morals: Pick the following tactics: Spend your renown points as shown below: Talismans 4 x 23 (or better) Wounds 4 x 23 (or better) Initiative Pots
KOTBS 2 Handed Build
Spent you ability points as shown below: Path of Conquest 10 points / Path of Vigilance 11 Points / Path of Glory 8 Points Pick the following morals: Pick the following tactics: Spend your renown points as shown below: Talismans 4 x 23 (or better) Wounds 4 x 23 (or better) Initiative Pots