Archetype: Ranged DPS
Special Mechanic: Mechanical Gadgets
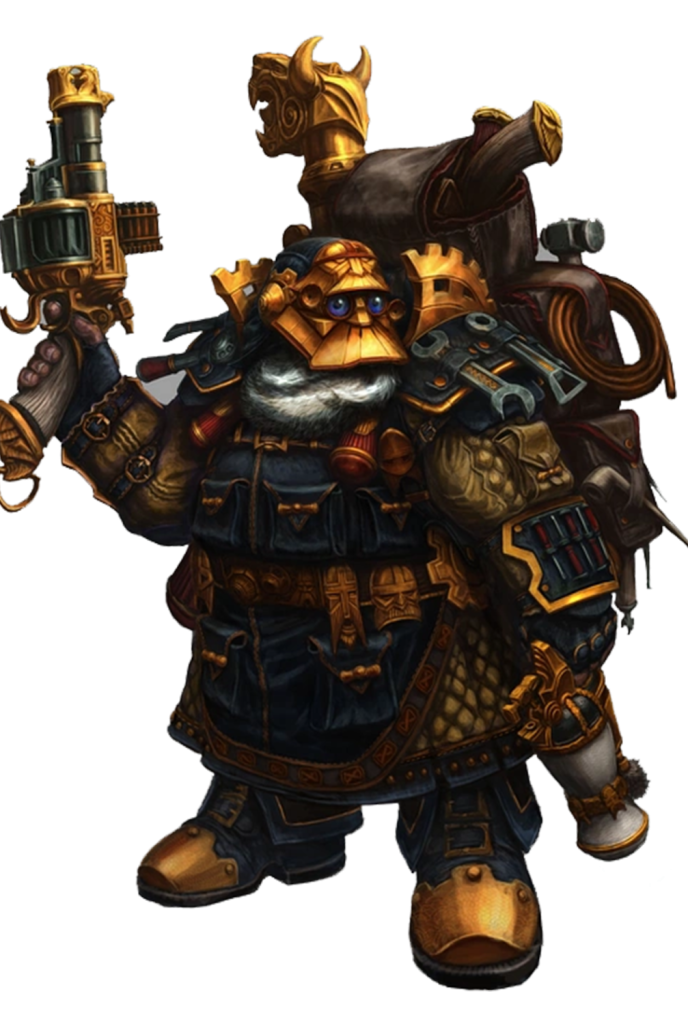
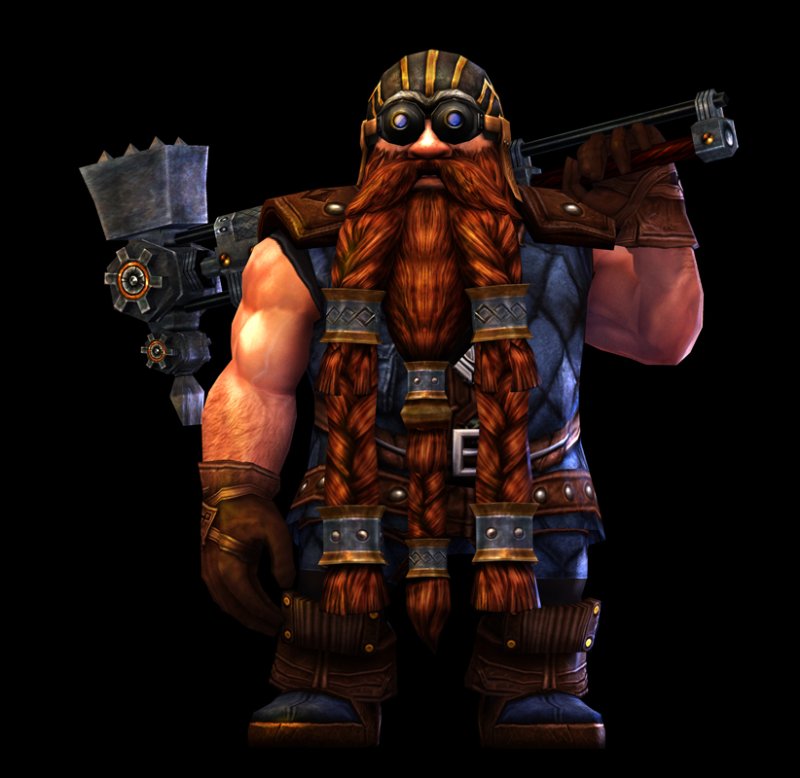
Class Details: Engineers are defensive ranged fighters who specialize in gadgets and black powder weapons. The engineer’s many mechanical aids include turrets and traps, which allow them to prepare the battlefield for either an offensive ambush or a strategic defense.
As an Engineer, the heart of your job is to rain destruction on the heads of your enemies. Like other ranged combatants, you prefer to avoid the frontline. However, unlike most other ranged classes, you reach the peak of your power at a relatively short range. You must maneuver wisely, positioning yourself so that you can strike at your target without exposing yourself to their attacks. You are a capable melee fighter, and you can strike at extended range, but your best attacks – grenades, blunderbusses, artillery bombardment, and more – require a closer position.
Career Masteries
The Dwarfs first discovered the secrets of black powder, and no one can rival them when it comes to putting it to good use. Armed with guns, grenades, and gadgets, the Engineers often prepare traps and ambushes throughout the battlefield before the fight begins, and then quickly dispatch any surviving enemies from a safe distance.
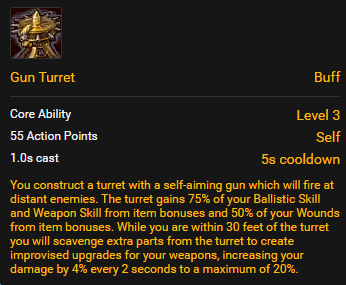
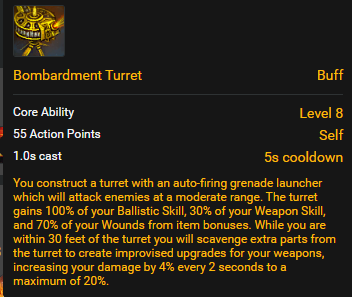
Crossbows were good and fine, but nowadays, a gun is better – and if a gun is good, then an automated self-aiming gyro-mounted gun turret with a cyclic grenade feeder and napalm canister is even better yet! An Engineer has gadgets and gizmos to suit any situation, and is virtually an entire battle line on his own.
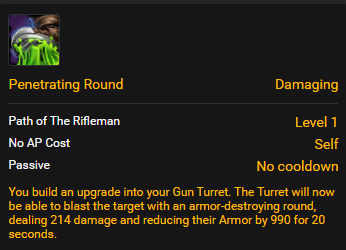
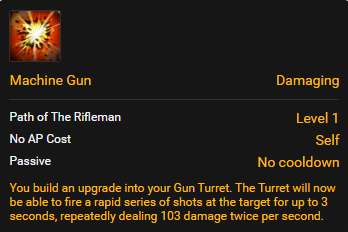
Path Of The Rifleman
This path focuses on long-range attacks, and taking your time with carefully aimed precision shots. A master of this path prefers to stand back away from the hectic front lines of battle, and dispatch his enemies quickly and cleanly from behind defensive cover.
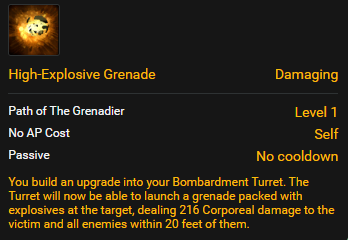
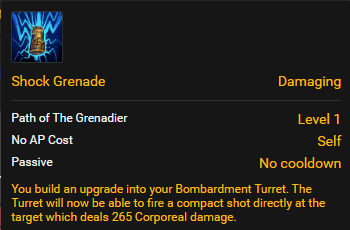
Path of The Grenadier
This mastery is primarily focused on grenades and bombs, powerful explosives which may be quickly tossed into the middle of a fray to wreak havoc on enemies. While their effective range may be shorter than a gun’s – after all, Dwarf arms aren’t exactly build to throw for distance – grenades make up for this through sheer stopping power and swift arming times.
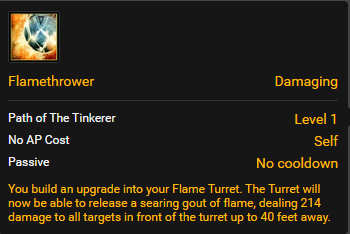
Path of The Tinkerer
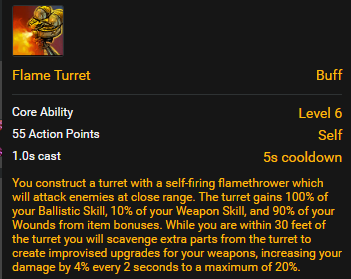
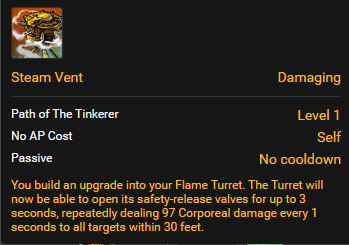
A specialist in this path is concerned mainly with his deploy-able constructs, preferring to fight from near the safety of his turrets while he lays out his foes with swings of his heavy steel wrench. Master tinkerers have also been known to use additional deploy-able devices above and beyond turrets as well, and many are the Engineers who’ve been banned for life from a blacksmith’s forge after trying to test and improve the heat thresholds of land mines.
Important Stats
As an engineer you will need the following statistics which you can improve using armor sets, weapons, rings, talismans and renown points.
Ballistics: Increase your damage with all skills and reduce the chance to be dodged.
Weapons Skill: Increases your armor penetration and parry. You need armor penetration when playing the path of rifleman and parry is a good defensive stat against melee enemies.Only needed for path of Rifleman & Tinker Builds)
Critical Chance: Increases your chance to deal critical damage ( not the amount).
Wounds: Increases your overall HP. You can never have enough HP.
Acquiring Gear
There are many ways to get gear:
- Open RvR: The gear and weapons you get here are for your main spec. When you kill or lock a zone you will be given a number of War Crests according to your level which you can trade for armor and weapons. At the end of a zone if you roll high enough you will be give a color bag with may contain certain tokens that you can trade and get a jewel set. Engineers don’t have defensive jewels set like other classes.
- Scenarios: Scenarios remain a very strong source of gear. You continue to earn War Crests at the end of every scenario, which are then traded with vendors in Altdorf (Order) or the Inevitable City (Destruction) for armor and weapons. The quality of gear from scenarios can still be among the best in the game, making them a crucial part of gearing up.
- Achievements & Tokens: The Tome of Knowledge is still a vital system. By completing achievements (e.g., killing a certain number of creatures, collecting specific items, or exploring areas), you unlock entries in your Tome. These unlocks can reward tokens that are then traded in the library in Altdorf or the Inevitable City for unique jewels or tactics. Some very desirable sets and bonuses can be acquired this way. The development team has continued to add more Tome Achievement Unlocks, including some tied to Live Events as of 2025.
- Tier 4 epic quests: The epic quest lines in each area continue to be a source of significant rewards. Upon completing these lengthy, multi-step quest chains, you are typically given a choice of a powerful item, often with unique appearances or stats. These quests are a reliable way to get high-quality gear.
- Dungeons & Lairs: Dungeons and lairs are still important for acquiring gear, weapons, and jewels, both while leveling up and for end-game progression. The RoR team has been actively updating and even adding new PvE content. For example, as of early 2025, there’s a “Lost Vale” dungeon update introducing new armor sets (Dark Promise sets, including main spec, off-spec, and hybrid options), and materials for crafting permanent rings.
- Ward System: The game utilizes a “Ward” system where you often need to unlock lower-tier Ward sets before being able to equip higher-tier dungeon gear (e.g., Gunbad -> City -> Bastion Stair).
- Public Quests (PQs): While not strictly “dungeons,” PQs are large-scale PvE events that can also provide gear through loot bags. RoR has implemented different difficulties for PQs (Easy, Normal, Hard) which scale with the recommended number of players and offer varying loot quality.
The Engineer: Master of Battlefield Control and Ranged Firepower
The Engineer of the Empire stands as a unique ranged DPS class in Warhammer Online: Return of Reckoning, specializing in the deployment of intricate gadgets and the devastating power of black powder weaponry. Unlike conventional ranged damage dealers, the Engineer is a defensive ranged fighter who excels at shaping the battlefield through tactical placement of turrets and traps, making them invaluable for both offensive ambushes and strategic defenses in Realm vs. Realm (RVR).
RVR Strengths: The Strategic Architect
- Battlefield Preparation and Control: The Engineer’s defining characteristic is their ability to “prepare the battlefield.” Their array of turrets and traps allows them to dictate the flow of combat, creating zones of control, denying enemy movement, and enhancing their own or their allies’ effectiveness. This makes them a highly strategic class, rewarding foresight and careful positioning in RVR.
- Dual Specializations for Diverse RVR Roles: The Engineer’s two main specializations offer distinct playstyles, each with specific advantages in RVR:
- Long-Range Single-Target (Marksman) Spec: This build excels at precision targeting and applying sustained pressure. It’s ideal for defending keeps and forts, where the Engineer can position themselves on high, protected vantage points to pick off specific enemy targets, such as healers, squishy DPS, or siege operators. In 6-man groups, this spec provides crucial single-target focus fire, quickly eliminating key threats.
- Medium-Range AoE (Grenadier) Spec: This specialization transforms the Engineer into a formidable area-of-effect damage dealer. The Grenadier is excellent for kiting larger groups of enemies, slowing their advance while raining down explosive damage. This is the preferred spec for warband play as it allows the Engineer to contribute significant damage to large-scale melees and choke points. Additionally, its AoE capabilities are exceptionally potent for keep and fort defense, barraging enemy attackers as they push through confined spaces. This spec offers medium to great overall DPS damage output.
- Utility and Buff/Debuff Potential: Beyond raw damage, Engineers bring valuable utility. Learning to effectively deploy turrets and utilize their abilities is crucial, as they can provide beneficial buffs to allies (e.g., healing turrets, morale-generating turrets) and apply damaging debuffs to enemies, further maximizing the Engineer’s contribution to their group’s overall damage output and survivability.
RVR Challenges: The Setup Dependent Specialist
- Setup-Dependent Gameplay: A critical consideration for both Engineers and their teammates is that the Engineer, much like the Magus, is fairly weak when not set up. Their core mechanics revolve around deploying turrets and traps, which takes time and often requires a stable position. In highly mobile or chaotic RVR engagements, the Engineer can struggle to deploy effectively, becoming vulnerable. This means a good Engineer player needs to anticipate enemy movements and choose their positioning wisely, while their group needs to provide them with the space and protection to establish their “den.”
- Turret Management: While fun, the turrets are a core mechanic that can be a burden in certain situations. They require careful placement, protection, and sometimes repositioning. If turrets are destroyed or if the fight moves too quickly, the Engineer’s effectiveness can plummet. Mastering turret placement, recognizing when to reposition, and understanding how to protect them is key to maximizing their RVR impact.
- Limited Warband Slots: While the Grenadier spec is welcomed in warbands, there is typically only a spot for one Engineer due to the unique nature of their AoE damage and utility, and the potential for overlapping roles.
The Engineer in RVR: A Master of the Battlefield
The Engineer offers a deeply strategic and rewarding RVR experience for players who enjoy controlling the flow of battle. Their ability to prepare the ground, unleash focused single-target or devastating AoE damage, and provide crucial utility makes them a valuable asset. While they demand a tactical approach and can be vulnerable without proper setup, a well-played Engineer can transform the RVR landscape, turning predictable engagements into a deadly gauntlet for their foes and a fortified stronghold for their allies.
Playing a Damage Per Second (DPS) class in Warhammer Online: Return of Reckoning (RoR) is all about maximizing your offensive output, assisting your tank, and eliminating enemy threats efficiently. While tanks soak damage and healers keep everyone alive, DPS are the sharp end of the spear, responsible for taking down the enemy.
Just like with tanks, the specific skill names and mechanics will vary slightly between DPS careers (e.g., White Lion, Slayer, Witch Hunter, Shadow Warrior for Order; Choppa, Marauder, Sorcerer, Squig Herder for Destruction), but the core principles of effective DPS remain consistent.
The Core Philosophy of a RoR DPS
A successful RoR DPS focuses on:
- Target Prioritization: Knowing who to hit and when to hit them.
- Damage Maximization: Utilizing your rotations, procs, and cooldowns effectively to output the highest possible damage.
- Situational Awareness: Avoiding unnecessary damage, positioning for optimal attacks, and reacting to battlefield changes.
- Assisting Allies: Peeling for healers, interrupting key enemy abilities, and adding utility where needed.
Essential DPS Skills and Their Usage
1. Core Damage Abilities (Spam/Rotation Skills)
- What they do: These are your bread-and-butter attacks, forming the core of your damage rotation. They generate resources (if applicable) or simply deal consistent damage.
- When they’re used:
- On Cooldown (or as part of your rotation): Most DPS careers have a specific sequence of abilities that maximize their damage output. Learn this rotation and execute it consistently.
- Resource Management: If your class uses a resource (e.g., Meticulous Strike for Witch Hunters generating ‘Accuracy’), ensure you’re using your skills in a way that keeps your resource high enough to use your more powerful abilities.
- Example: As a Choppa, your core rotation might involve alternating between “Furious Choppa” (damage + rage generation) and “Rampage” (damage + rage consumption), trying to keep your “Reckless Abandon” buff up as much as possible. You’re constantly hitting these abilities as soon as they’re available, focusing on your primary target.
2. Burst / Cooldown Abilities
- What they do: These are your most powerful damage-dealing abilities, often with long cooldowns. They are designed to deliver a massive spike of damage in a short window.
- When they’re used:
- Opening Engagements: Often used at the very start of a fight, especially in coordinated assaults, to quickly eliminate a priority target.
- Execute Phase: When an enemy’s health drops low, burst abilities can quickly finish them off before they can be healed or escape.
- Responding to Healing: If an enemy is being heavily healed, a coordinated burst from multiple DPS can overwhelm the healing.
- Focus Fire: Used in conjunction with other DPS to quickly eliminate a pre-called target.
- Example: As a Sorcerer, you might open with “Daemonic Breath” or “Gaze of the Dark Gods” to apply a powerful debuff or initial burst, followed by your core rotation. When your group calls for a focus fire on an enemy healer, you pop your “Gifts of Chaos” to significantly amplify your damage for a short duration and unleash your most powerful spells.
3. Interrupts (Punt, Stagger, Silence)
- What they do: These abilities stop an enemy’s current cast, preventing them from using a spell or channeled ability.
- When they’re used:
- Critical Casts: Identify and interrupt high-impact enemy abilities. This includes:
- Heals: Stopping enemy healers from saving their allies.
- CC: Preventing enemy mages from polymorphing your tank or putting your healer to sleep.
- Big DPS Spells: Interrupting powerful AoE nukes or single-target burst spells.
- Denying Resources: Some abilities are crucial for resource generation. Interrupting them can starve an enemy.
- Setting up Kills: Interrupting an enemy’s escape ability can ensure they stay in range for your group to finish them.
- Critical Casts: Identify and interrupt high-impact enemy abilities. This includes:
- Example: You see an enemy Archmage beginning to cast “Healing Resonance,” a powerful AoE heal. You immediately use your “Rift Blade” (Shadow Warrior) or “Gut Ripper” (Witch Hunter) to interrupt the cast, denying their group a significant amount of healing.
4. Crowd Control (CC) – Roots, Snares, Stuns, Disarms, Blinds
- What they do: These abilities impair enemy movement, actions, or vision, making them vulnerable or preventing them from attacking.
- When they’re used:
- Peeling for Allies: If an enemy melee DPS is on your healer, a root or snare can create distance, allowing your healer to escape or for your tank to re-engage.
- Target Isolation: Rooting a specific enemy can prevent them from fleeing or reaching their allies for healing.
- Setting Up Kills: Stuns can hold an enemy in place for your group to burst them down without retaliation. Disarms prevent melee attackers from using their weapons.
- Kiting: Applying snares to keep dangerous melee enemies at a distance while you deal damage.
- Example: An enemy Witch Elf has bypassed your tank and is now tearing into your Bright Wizard. You quickly apply a “Winged Death” (Witch Hunter) to root the Witch Elf, allowing your Bright Wizard to create distance and for your tank to pick them up.
5. Debuffs (Offensive Utility)
- What they do: DPS classes often have abilities that reduce enemy armor, resistances, outgoing damage, or healing received.
- When they’re used:
- Focus Fire Enhancement: Apply armor or resistance debuffs to the enemy target your group is focusing. This significantly increases the damage all your allies deal to that target.
- Threat Reduction: Debuffs that reduce enemy damage output can ease the burden on your healers, especially from dangerous melee DPS.
- Anti-Heal: Apply anti-healing debuffs to enemy healers or high-priority targets to reduce the effectiveness of incoming healing.
- Example: Your warband is focusing an enemy Ironbreaker. As a Squig Herder, you consistently apply “Barbed Arrow” to him, reducing his armor and making him much easier for your entire group to burn down.
General DPS Principles
- Target Priority:
- Healers First (often): Eliminating enemy healers is usually the quickest way to win a fight.
- Squishy DPS: Mages, archers, and some melee DPS are often easier to kill than tanks and can deal significant damage if left unchecked.
- Debuffers/CCers: Sometimes, taking out an enemy who is consistently applying powerful debuffs or CC to your team is a higher priority.
- Tanks Last: Tanks are designed to be hard to kill. Only focus them if all higher priority targets are dead or they are isolated and vulnerable.
- Positioning:
- Melee DPS: Stay on the enemy’s flanks or back to avoid cleaves and maximize your damage (some classes get bonuses for this). Stick to your tank’s target or peel for your healers.
- Ranged DPS: Maintain maximum range from the enemy frontline while still having line of sight to your target. Stay near your healers for potential peels or heals. Avoid being isolated.
- Situational Awareness:
- Watch for Enemy CC: Be ready to break free from roots, snares, or stuns, or to anticipate them and use a defensive ability.
- Avoid AoE: Don’t stand in enemy AoE spells. Even as a DPS, taking unnecessary damage taxes your healers.
- Protect Yourself: Don’t rely solely on your healers. Use your personal defensive abilities (e.g., “Dodge” for Witch Hunters, “Thousand Cuts” for Slayers) when you’re taking heavy damage.
- Communication: Call out your targets, especially if you’re initiating on a healer. Let your group know if you’re getting focused or if you’re out of position.
- Renown Skills: Prioritize offensive renown skills like Weapon Skill/Ballistic Skill, Initiative, and Strength/Intelligence. Defensive renown can be useful too, but your primary role is damage.
- Potions: Keep damage potions and speed potions on hand to enhance your burst or escape sticky situations.
By mastering these elements, a DPS player in RoR becomes a crucial force, turning the tide of battle through decisive damage and intelligent utility.
Pre Best in Slot Gear (Rifleman)
|
|||
| Helmet: | Readeye Set | ||
| Shoulders: | Readeye Set | ||
| Cloak: | Beastlord Set | ||
| Chest: | Readeye Set | ||
| Belt: | Readeye Set | ||
| Gloves: | Readeye Set | ||
| Boots: | Readeye Set | ||
| Mainhand: | War Crest Vendor with Sniper’s Prefix | ||
| Offhand: | War Crest Vendor with Sniper’s Prefix | ||
| Jewelry Slot 1: | Vanguard Cape of Accuracy (Vendor) | ||
| Jewelry Slot 2: | Martial Buckle of Accuracy (Vendor) | ||
| Jewelry Slot 3: | Beastlord Set & pocket | ||
| Jewelry Slot 4: | Undying Drafted Ring (Gunbad) | ||
| Talisman: | Weapon Skill | ||
Pre Best in Slot Gear (Grenadier)
|
|||
| Helmet: | Redeye Set | ||
| Shoulders: | Redeye Set | ||
| Cloak: | Beastlord Set | ||
| Chest: | Redeye Set | ||
| Belt: | Redeye Set | ||
| Gloves: | Redeye Set | ||
| Boots: | Redeye Set | ||
| Mainhand: | War Crest Vendor with Sniper Prefix | ||
| Offhand: | War Crest Vendor with Sniper Prefix | ||
| Jewelry Slot 1: | Genesis Remnant of the Sharpshooter | ||
| Jewelry Slot 2: | Genesis Aspect of the Sharpshooter | ||
| Jewelry Slot 3: | Beastlord Set & Pocket | ||
| Jewelry Slot 4: | Undermountain Drafted Ring | ||
| Talisman: | Armor | ||
Pre Best in Slot Gear (Tinkerer)
|
|||
| Helmet: | Readeye Set | ||
| Shoulders: | Readeye Set | ||
| Cloak: | Beastlord Set | ||
| Chest: | Readeye Set | ||
| Belt: | Readeye Set | ||
| Gloves: | Readeye Set | ||
| Boots: | Readeye Set | ||
| Mainhand: | War Crest Vendor with Sniper’s Prefix | ||
| Offhand: | War Crest Vendor with Sniper’s Prefix | ||
| Jewelry Slot 1: | Vanguard Cape of Accuracy (Vendor) | ||
| Jewelry Slot 2: | Martial Buckle of Accuracy (Vendor) | ||
| Jewelry Slot 3: | Beastlord Set & pocket | ||
| Jewelry Slot 4: | Undying Drafted Ring (Gunbad) | ||
| Talisman: | Weapon Skill | ||
