| Career information | |
|---|---|
| Race | Empire |
| Role | Healer |
| Armor | Medium Robe |
| Weapons | 1h hammer 2h hammer Charm Shield |
| Special Mechanic | Righteous Fury |
| Mirror Career | Disciple of Khaine |
| Gender | Both |
| Abbrevations | WP |
Archetype: Healer
Special Mechanic: Righteous Fury
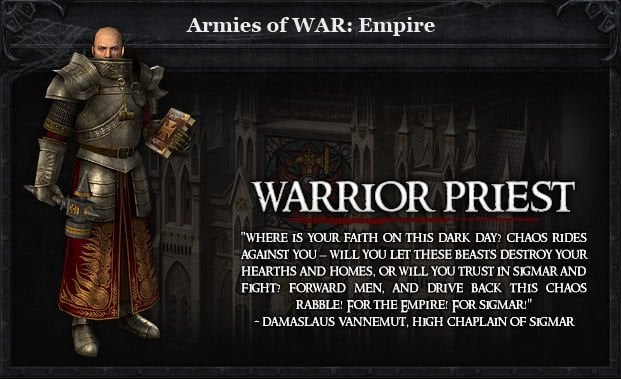
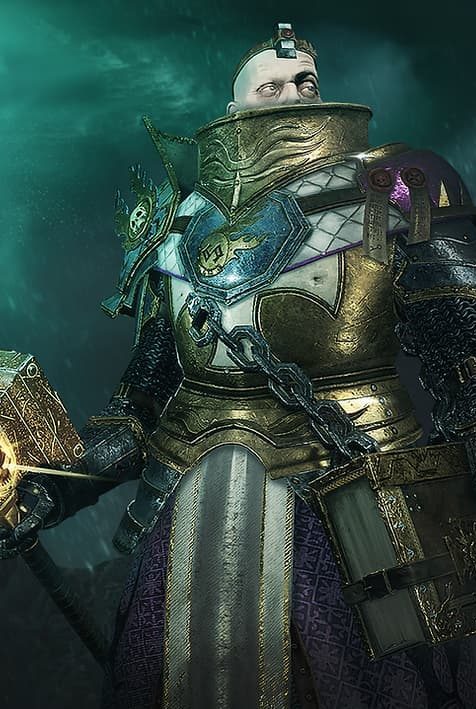
Class Details: Close-combat healers, Warrior Priests use Righteous Fury to power their support and healing magic. Righteous Fury builds up via dedicated prayers and melee combat, and as a result Warrior Priests have to be actively involved on the front lines to be able to support their groups.
As a Warrior Priest, your place is in battle. Your Righteous Fury grows as you strike down the enemy in Sigmars name, and your divine powers grow with Righteous Fury. Thus, to reach the peak of your power you must join in the fight. Your prayers bear the power of your god to take life, or give it back, but they are designed to compliment your melee capabilities. Your blessings bring powerful boons to those around you, but you must be close to the fight for your words to reach them. To do your job you must place yourself at risk, but it is in this risky position which you are most powerful.
Career Masteries
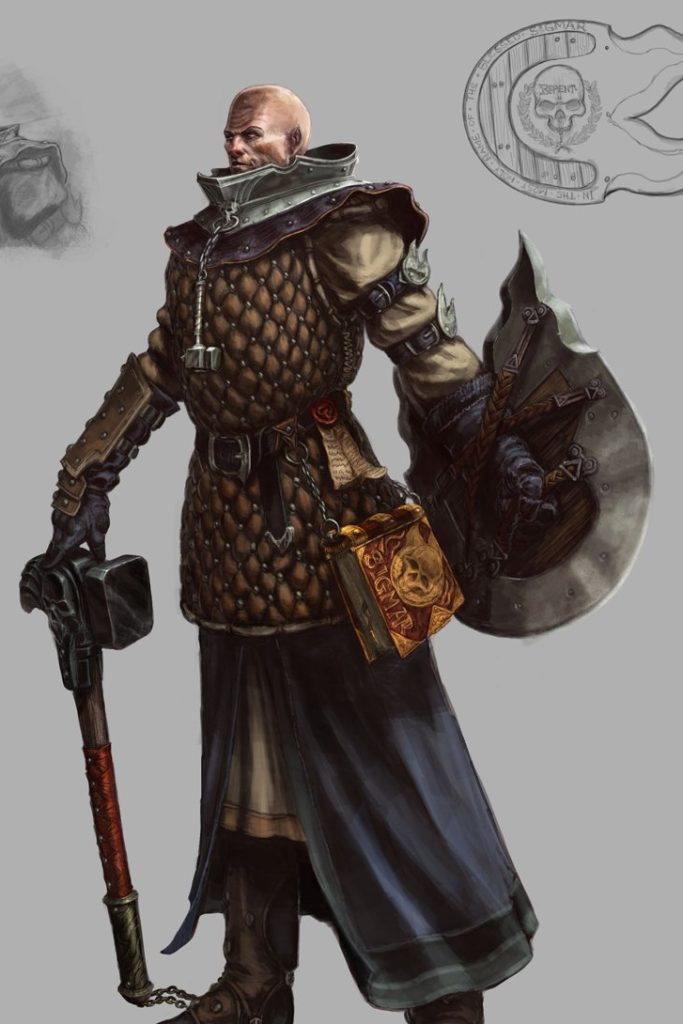
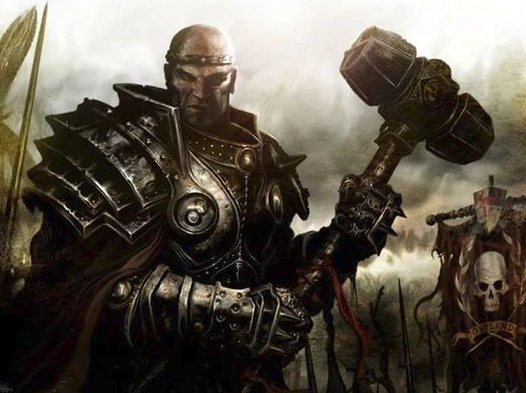
The Warrior Priests worship Sigmar, the now-deified warrior who united the tribes of man and formed the Empire long ago. In honor of their legendary patron, the Warrior Priests seek to follow in Sigmars warrior path by purifying the Empire with equal measures of prayer and might. They march into battle shouting holy scriptures even as they bring their blessed warhammers to bear in the name of their god. By proving their devotion and righteousness through valor in combat, they are rewarded with divine powers, which manifest in the form of potent healing abilities. Their presence on the front lines of battle serves as a constant inspiration to the soldiers who march in defense of the Empire. Sigmar is a warrior god, and his priests gain divine favor only by fighting to defend the Empire that he built. The holy symbol of Sigmar is a hammer, and the Warrior Priests have adopted the warhammer as their weapon of choice in honor of their patron. The Righteous Fury of Sigmar fills the Warrior Priest with each swing of their weapon, and this divine power can then be used to fuel their healing magic. This becomes something of both a freedom and a restriction for the Warrior Priest – since all of his magic is powered by Righteous Fury, he can throw himself wholeheartedly into melee combat and then still have resources left to heal with, but at the same time, his healing capabilities become dramatically more limited when there are no enemies in arms reach.
Path of Salvation
The Path of Salvation focuses on divine magic, primarily healing abilities. A player who specializes in Salvation will become a much more powerful healer, although they will still need to place themselves into the front lines of a melee combat in order to build up their Righteous Fury.
Path of Grace
The Path of Grace is centered around melee attacks which inspire and bolster the Warrior Priest and his allies. A Master of Grace will be able to simultaneously wreak havoc upon his enemies with his warhammer and improve himself and his companions, making him an especially valuable player when standing side-by-side with other allies.
Path of Wrath
The Path of Wrath is focused on crippling melee attacks which weaken, hinder, and harass the players opponents. Someone who specializes in Wrath will certainly be the most offensively-focused type of Warrior Priest, as they will be both damaging their enemies and weakening them with each swing of their warhammer.
Important Stats
As a Warrior Priest you will need the following statistics which you can improve using armor sets, weapons, rings, talismans and renown points
Will Power: Increases your healing Power and increases the chance to disrupt enemy spells.
Healing Critical: Increase your chance to do Critical heals.
Wounds: Increases your overall HP. You can never have enough HP.
Armour: Reduces the physical damage you receive from physical damage.
Acquiring Gear
There are many ways to get gear:
- Open RvR: The gear and weapons you get here are for your main spec. When you kill or lock a zone you will be given a number of War Crests according to your level which you can trade for armor and weapons. At the end of a zone if you roll high enough you will be give a color bag with may contain certain tokens that you can trade and get a jewel set. Engineers don’t have defensive jewels set like other classes.
- Scenarios: Scenarios remain a very strong source of gear. You continue to earn War Crests at the end of every scenario, which are then traded with vendors in Altdorf (Order) or the Inevitable City (Destruction) for armor and weapons. The quality of gear from scenarios can still be among the best in the game, making them a crucial part of gearing up.
- Achievements & Tokens: The Tome of Knowledge is still a vital system. By completing achievements (e.g., killing a certain number of creatures, collecting specific items, or exploring areas), you unlock entries in your Tome. These unlocks can reward tokens that are then traded in the library in Altdorf or the Inevitable City for unique jewels or tactics. Some very desirable sets and bonuses can be acquired this way. The development team has continued to add more Tome Achievement Unlocks, including some tied to Live Events as of 2025.
- Tier 4 epic quests: The epic quest lines in each area continue to be a source of significant rewards. Upon completing these lengthy, multi-step quest chains, you are typically given a choice of a powerful item, often with unique appearances or stats. These quests are a reliable way to get high-quality gear.
- Dungeons & Lairs: Dungeons and lairs are still important for acquiring gear, weapons, and jewels, both while leveling up and for end-game progression. The RoR team has been actively updating and even adding new PvE content. For example, as of early 2025, there’s a “Lost Vale” dungeon update introducing new armor sets (Dark Promise sets, including main spec, off-spec, and hybrid options), and materials for crafting permanent rings.
- Ward System: The game utilizes a “Ward” system where you often need to unlock lower-tier Ward sets before being able to equip higher-tier dungeon gear (e.g., Gunbad -> City -> Bastion Stair).
- Public Quests (PQs): While not strictly “dungeons,” PQs are large-scale PvE events that can also provide gear through loot bags. RoR has implemented different difficulties for PQs (Easy, Normal, Hard) which scale with the recommended number of players and offer varying loot quality.
The provided text for the Warrior Priest accurately portrays its unique identity as a melee-oriented healer, highlighting its reliance on Righteous Fury generated through combat. It correctly identifies its “tankiness,” its strong healing capabilities across single-target and AoE, and its applicability in all RVR scenarios.
To provide a more comprehensive and engaging RVR role analysis, we can elaborate on the implications of its frontline presence, emphasize how its resource management impacts gameplay, and detail the strategic advantages it brings to RVR.
The Warrior Priest: Imperial Zealot of the Frontline Faith
The Warrior Priest in Warhammer Online: Return of Reckoning is a distinct and highly sought-after melee healing class, challenging the conventional archetype of a backline support. These devoted servants of Sigmar use Righteous Fury to power their potent healing and support magic, a resource generated directly through dedicated prayers and active melee combat. This fundamental mechanic demands that Warrior Priests be actively involved on the front lines, making them not just healers, but integral, resilient components of any RVR push or defense.
RVR Strengths: The Unbreakable Anchor
- Frontline Healing Power: Unlike typical healers, the Warrior Priest’s healing output is intrinsically linked to their presence in the thick of combat. This allows them to provide extremely fast heals to those taking the brunt of enemy damage. They are equipped with a versatile array of healing spells, including powerful single-target and AoE heals for the party, as well as AoE heals for allies outside the immediate party, making them incredibly effective at sustaining large groups through intense RVR melees.
- Exceptional Survivability (“Tankiest Healer”): The Warrior Priest is widely regarded as one of, if not the most, “tankiest” healers in the game. Their inherent resilience, combined with their ability to sustain themselves, makes them incredibly difficult targets to dislodge. This durability allows them to remain on the front lines, constantly generating Righteous Fury and delivering crucial heals where they are most needed. This also means they can defend themselves effectively against 1-2 enemies, often buying critical time for their allies to peel or assist.
- Powerful Crowd Control & Utility: Beyond healing and tankiness, Warrior Priests bring significant utility to RVR:
- Single-target Detaunt & AoE Detaunt: Crucial for managing enemy aggression, pulling focus off squishy allies, or helping tanks maintain threat.
- Resurrection: The ability to recover after losses by resurrecting allies is a fundamental RVR mechanic, allowing groups to quickly re-engage or reinforce positions.
- Universal RVR Applicability: The Warrior Priest is an invaluable asset across all RVR scenarios:
- 6-Man Small Roaming Groups & Scenarios: Their ability to provide potent frontline heals and their sheer survivability make them ideal for aggressive, mobile small groups. A duo with a KotBS is particularly strong.
- Warbands of All Forms and Formations: They are absolutely essential for sustaining the frontlines of any 24-man warband. Their AoE healing and their ability to generate resources through melee combat ensure continuous support even amidst the most chaotic melees. Many consider them the best healer for warbands, alongside the Disciple of Khaine on the Destruction side.
RVR Challenges: Resource Management and Positioning
- Righteous Fury Management: The Warrior Priest’s unique resource system requires skillful management of two resources: Action Points (AP) and Righteous Fury (RF). Players must learn to balance converting AP to RF (which requires standing still and healing for a few seconds) with DPSing to gain more RF. This active resource generation means a WP cannot simply sit back and heal; they must be constantly engaged in melee to be at their most effective. This adds a layer of complexity but also makes them a highly dynamic healer.
- Frontline Positioning: While their tankiness allows them to be on the front, learning to position oneself out of harm’s way while still remaining in melee range for RF generation is a constant challenge. A mispositioned Warrior Priest, even with their durability, can be overwhelmed by focused enemy fire.
The Hybrid Playstyle: DPS Warrior Priest (Niche)
- The Warrior Priest has three potential builds: pure healing, 2-Handed DPS, and healing or DPS with a shield. While a DPS build can perform well and maintain some self-healing capabilities, it will not match a pure DPS career’s output. For many, this makes it a fun but not a viable build for serious RVR, as the immense healing potential of a dedicated healing WP is generally more valuable to a group. However, some players and specific niche warband compositions might find a use for a more damage-focused variant.
In essence, the Warrior Priest is the unyielding anchor of Order’s RVR presence. Their unique blend of melee combat, powerful healing, and incredible durability allows them to sustain their allies from the very heart of the conflict. A skilled Warrior Priest doesn’t just keep health bars topped; they lead from the front, a beacon of faith empowering their comrades to push forward against the tide of Destruction.
Healers are the lifeblood of any group in Warhammer Online: Return of Reckoning (RoR). Your role is not just to mend wounds, but to enable your allies to fight effectively, mitigate incoming damage, and even contribute to crowd control and debuffs. A skilled healer is often the difference between a triumphant push and a wipe.
While the specific spells and mechanics vary between healing careers (e.g., Archmage, Warrior Priest, Shaman, Disciple of Khaine for Order/Destruction), the fundamental principles of effective healing remain consistent.
The Core Philosophy of a RoR Healer
A masterful RoR healer excels at:
- Sustained Healing: Keeping the frontline and key damage-takers alive through continuous incoming damage.
- Burst Healing: Delivering rapid, high-impact heals to save allies from sudden, heavy damage.
- Damage Mitigation/Prevention: Using protective buffs, cleanses, and even timely crowd control to reduce the need for healing.
- Resource Management: Efficiently using your mana/resources to ensure you don’t run dry in critical moments.
- Situational Awareness: Knowing who needs healing most, anticipating damage, and avoiding enemy threats.
- Utility & Support: Contributing with buffs, debuffs, and even offensive capabilities when the healing demand allows.
Essential Healer Skills and Their Usage
1. Single-Target Heals (Direct & HoT)
- What they do: These are your primary tools for keeping individual allies alive.
- Direct Heals: Instantly restore a significant amount of health.
- Heal-over-Time (HoT): Apply a buff that restores health gradually over a duration.
- When they’re used:
- Direct Heals: Use these on allies taking heavy, focused damage, especially your tanks or a squishy DPS/healer being targeted by enemies. They are reactive and for immediate crisis management.
- HoTs: Apply these proactively to your tanks and anyone expected to take consistent damage. They are efficient for sustained healing and less mana-intensive over time. Keep them refreshed on key targets.
- Example: Your tank (Guarded by another tank, hopefully!) is taking consistent damage from enemy DPS. You keep your powerful HoT (e.g., Archmage’s “Restorative Burst” or Warrior Priest’s “Divine Favor”) active on them at all times. If their health suddenly drops significantly from a burst, you immediately follow up with a strong direct heal (e.g., Archmage’s “Gust of Wind” or Warrior Priest’s “Prayer of Healing”).
2. Area-of-Effect (AoE) Heals
- What they do: These spells restore health to multiple allies within a specified area around you or your target.
- When they’re used:
- Group Damage: When your entire group is taking widespread AoE damage (e.g., from enemy mages, or in a large melee scrum).
- Tight Formations: Effective when your group is stacked together, such as when pushing a door or holding a choke point.
- Efficiency: AoE heals are often less efficient per target than single-target heals but provide massive value when many allies are wounded.
- Example: Your warband just pushed through a gate, and several enemy Sorcerers unleash a volley of AoE spells, dropping multiple allies to low health. You quickly position yourself centrally and unleash your AoE heal (e.g., Shaman’s “Effigy of Mork” or Warrior Priest’s “Zealous Blessing”) to bring everyone back up.
3. Cleanses / Debuff Removal
- What they do: These abilities remove harmful debuffs (e.g., roots, snares, disarms, morale drains, damage-over-time effects) from your allies.
- When they’re used:
- Targeted CC: Immediately cleanse crucial crowd control effects from your tank (to maintain Guard or positioning), your DPS (to allow them to attack), or another healer (to allow them to continue healing).
- Debuff Removal: Remove dangerous damage-over-time effects or debuffs that reduce healing effectiveness.
- Morale Drains: If your class has a cleanse for morale drains, use it to prevent allies from losing their powerful morale abilities.
- Example: Your tank is rooted by an enemy Bright Wizard, making them unable to chase a fleeing enemy or reposition to block incoming damage. You immediately cast your cleanse (e.g., Disciple of Khaine’s “Touch of the Undying” or Warrior Priest’s “Sprit of the Devout”) on them to free them.
4. Protective Buffs / Shields
- What they do: These abilities grant temporary defensive bonuses, such as increasing armor, resistances, parry/block/disrupt chances, or applying absorb shields that soak incoming damage.
- When they’re used:
- Anticipate Burst: Apply these before your allies take heavy damage. If you see an enemy group focusing one of your DPS, shield them proactively.
- Opening Engagements: Buff your frontline tanks at the start of a fight to reduce initial incoming damage.
- Crisis Management: Use them on a target that is already low but needs to survive another hit or two while your direct heals land.
- Example: You see an enemy Chosen charging into your Bright Wizard. You quickly apply a defensive shield (e.g., Archmage’s “Shield of Saphery” or Disciple of Khaine’s “Sacrifice”) to the Bright Wizard, allowing them to absorb some of the incoming damage while you cast a heal.
5. Morale Abilities (Defensive & Offensive)
- What they do: These powerful abilities build up as you fight and heal. They can range from massive AoE heals, to complete CC immunity, to powerful offensive boosts.
- When they’re used:
- Defensive Morale (e.g., “Replenish Spirit,” “Balance of Power”):
- Crisis Healing: Use your healing morale spells when your group is taking extreme damage and multiple allies are critically low. They are often fight-changing.
- Pushing Through Choke Points: When your group needs to survive a concentrated enemy assault to reach an objective.
- Offensive Morale (less common for healers, but some exist):
- If your healing class has an offensive morale (e.g., Shaman’s “Go Faster, Ladz!”), use it to support a coordinated DPS burst on an enemy target.
- CC Immunity Morale (e.g., “Juggernaut”): Use this when you are heavily focused by enemy CC and need to guarantee your heals or escape.
- Defensive Morale (e.g., “Replenish Spirit,” “Balance of Power”):
- Example: Your warband is pushing into the keep lord room, and the enemy unleashes all their AoE. Multiple tanks and DPS are at very low health. You activate your rank 4 healing morale (e.g., Archmage’s “Mastery of the Hearth”), bringing everyone back up and allowing your group to continue the push.
6. Offensive Abilities / Debuffs / CC (Situational)
- What they do: Most healers have a small set of offensive spells, debuffs (e.g., healing reduction), or CC (e.g., single-target mezz, snare).
- When they’re used:
- Low Healing Demand: When your group is healthy and not under immediate threat, you can contribute extra damage or utility.
- Assisting Focus Fire: Apply healing reduction debuffs to enemy healers or targets your group is trying to burst down.
- Peeling: Use a quick snare or single-target CC on an enemy that is on your backline.
- Resource Management: Some offensive abilities may help with resource generation (e.g., Disciple of Khaine’s “Rune of Khaine” for Bloodlord).
- Example: Your tank is holding a single enemy. Your group is healthy. You might throw in a few offensive spells or apply a healing debuff to the enemy (e.g., Disciple of Khaine’s “Soul Rend”) to help your DPS finish them faster, while keeping an eye on health bars.
Pre Best in Slot Gear (Tome)
|
|||
| Helmet: | Onsalught Set (Pve) | ||
| Shoulders: | Onsalught Set (Pve) | ||
| Cloak: | Onsalught Set (Pve) | ||
| Chest: | Onsalught Set (Pve) | ||
| Belt: | Onsalught Set (Pve) | ||
| Gloves: | Onsalught Set (Pve) | ||
| Boots: | Onsalught Set (Pve) | ||
| Mainhand: | BattleHammer of the Subjugator | ||
| Offhand: | Apostole’s Tome of Glory | ||
| Jewelry Slot 1: | Genesis Remnant of the Curative | ||
| Jewelry Slot 2: | Genesis Aspect f the Curative | ||
| Jewelry Slot 3: | Sentinel & (+4% Healing Critical) | ||
| Jewelry Slot 4: | Exquisite Gunbad Diamond | ||
| Talisman: | Armour & Wounds | ||
Best in Slot Gear (Tome)
|
|||
| Helmet: | Sovereign Set | ||
| Shoulders: | Sovereign Set | ||
| Cloak: | Sovereign Set | ||
| Chest: | Sovereign Set | ||
| Belt: | Sovereign Set | ||
| Gloves: | Sovereign Set | ||
| Boots: | Sovereign Set | ||
| Mainhand: | Fortress Smiter | ||
| Offhand: | Fortress Tome | ||
| Jewelry Slot 1: | Genesis Remnant of the Curative | ||
| Jewelry Slot 2: | Genesis Aspect f the Curative | ||
| Jewelry Slot 3: | Sentinel & (+4% Healing Critical) | ||
| Jewelry Slot 4: | Exquisite Gunbad Diamond | ||
| Talisman: | Armour & Wounds | ||
Pre Best in Slot Gear (Shield)
|
|||
| Helmet: | Sentinel Set | ||
| Shoulders: | Sentinel Set | ||
| Cloak: | Bloodlord Set | ||
| Chest: | Bloodlord Set | ||
| Belt: | Bloodlord Set | ||
| Gloves: | Sentinel Set | ||
| Boots: | Bloodlord Set | ||
| Mainhand: | War crest vendor – Sentry’s Prefix | ||
| Offhand: | |||
| Jewelry Slot 1: | Rough Gunbad Ruby | ||
| Jewelry Slot 2: | Rough Gunbad Diamond | ||
| Jewelry Slot 3: | Sentinel Set &(+4% Critical chance or Block or Red.Arm. Pen.) | ||
| Jewelry Slot 4: |
|
||
| Talisman: | Wounds & Armour | ||
Best in Slot Gear (Shield)
|
|||
| Helmet: | Warlord Set | ||
| Shoulders: | Warlord Set | ||
| Cloak: | Off-Set Sovereign | ||
| Chest: | Off-Set Sovereign | ||
| Belt: | Victorious Set | ||
| Gloves: | Off-Set Sovereign | ||
| Boots: | Victorious Set | ||
| Mainhand: | Titan’s battlehammer of the Reverence | ||
| Offhand: |
|
||
| Jewelry Slot 1: | Rough Gunbad Ruby | ||
| Jewelry Slot 2: | Rough Gunbad Diamond | ||
| Jewelry Slot 3: | Victorious Set &(+4% Critical chance or Block or Red.Arm. Pen.) | ||
| Jewelry Slot 4: | Warlord Set | ||
| Talisman: | Wounds & Armour | ||
Pre Best in Slot Gear (2 Handed)
|
|||
| Helmet: | Bloodlord Set | ||
| Shoulders: | Bloodlord Set | ||
| Cloak: | Bloodlord Set | ||
| Chest: | Bloodlord Set | ||
| Belt: | Bloodlord Set | ||
| Gloves: | Sentinel Set | ||
| Boots: | Bloodlord Set | ||
| Mainhand: | War crest vendor – Titan’s 2H Prefix | ||
| Offhand: | |||
| Jewelry Slot 1: | Geneis Remant of the Warrior | ||
| Jewelry Slot 2: | Genesis Fragment of Warrior | ||
| Jewelry Slot 3: | Sentinel Set & (+4% Melee Cretical) | ||
| Jewelry Slot 4: | Genesis Aspect of Warrior | ||
| Talisman: | Wounds & Weapon Skill | ||
Best in Slot Gear (2 Handed)
|
|||
| Helmet: | Off–Sovereign Set | ||
| Shoulders: | Warlord Set | ||
| Cloak: | Off–Sovereign Set | ||
| Chest: | Warlord Set | ||
| Belt: | Victorious Set | ||
| Gloves: | Off–Sovereign Set | ||
| Boots: | Victorious Set | ||
| Mainhand: | Bloodlord Sledge | ||
| Offhand: |
|
||
| Jewelry Slot 1: | Geneis Remant of the Warrior | ||
| Jewelry Slot 2: | Genesis Fragment of Warrior | ||
| Jewelry Slot 3: | Victorious Set & (+4% Melee Cretical) | ||
| Jewelry Slot 4: | Warlord Set | ||
| Talisman: | Wounds & Weapon Skill | ||


