| Career information | |
|---|---|
| Race | High Elves |
| Role | Tank |
| Armor | Heavy |
| Weapons | 1H Sword 2H Sword Shield |
| Special Mechanic | Blade Dance |
| Mirror Career | Black Orc |
| Gender | Both |
| Abbrevations | SM |
Archetype: Tank
Special Mechanic: Blade Dance
Class Details: Fighters specializing in magical attacks, Sword Masters string together short chains of attacks in a graceful Blade Dance. With each swing of their weapons they step into a more balance fighting position allowing them to use more powerful attacks and increase their balance even further. With magical enchantments to bolster the strength of their attacks, Sword Masters are deadly front-line warriors.
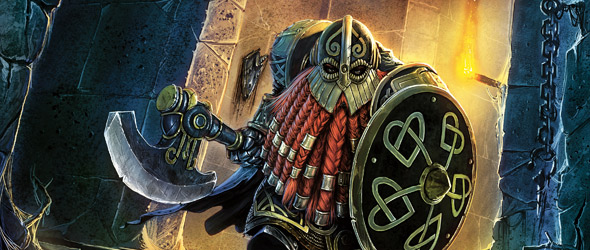
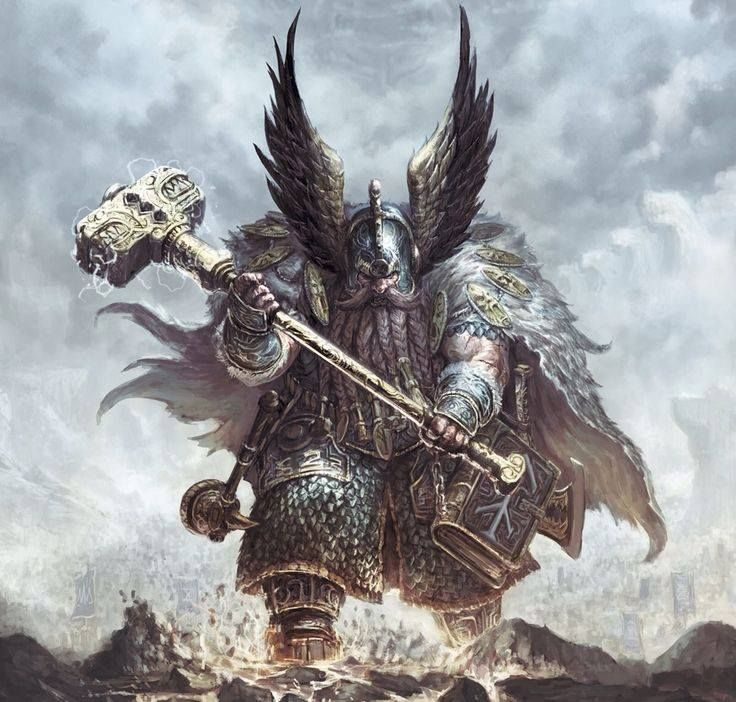
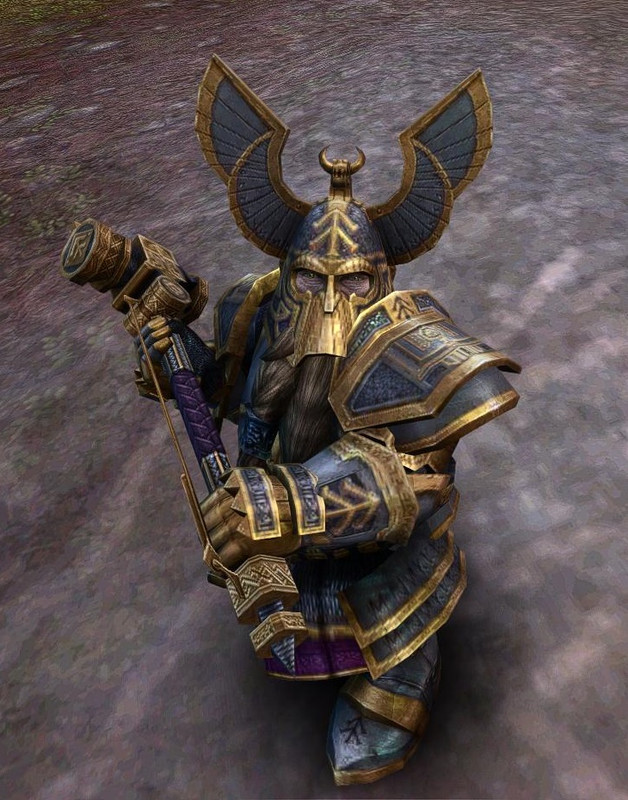
The Swordmaster is a juggernaut of skill and prowess. From birth, swordmasters are trained to be one with their swords. They use sword and shield styles of fighting to overcome their enemies with sheer skill. Swordmasters are the absolute best swordsmen in the world, as they train for centuries to become one with the blade. They combine dance with martial arts to make a deadly marriage of art and death.
Career Masteries
The Swordmaster fights with magical enchantments to bolster the strength of his attacks and is a deadly front-line warrior. Surprisingly agile with his finely-crafted Elven Greatsword, the Swordmaster is the vanguard of any Elf army. The Swordmaster strings together short chains of attacks in a graceful Blade Dance. With each swing of his weapon he steps into a more balanced fighting position, which allows him to use more powerful attacks, which then increase his balance even further.
Path of Khaine
The Path of Khaine focuses on the Sword master’s signature Elf Great sword, a massive but exquisite weapon which he can swing with deceptive speed. While no High Elf would ever worship the God of Warfare, a Master of this path acknowledges Khaine as a potent and necessary figure, and the Sword master brings swift death to any who stand in his way.
Path of Vaul
The Path of Vaul is primarily focused on defense, and a Master of this path may very well be temped to lay aside his Great sword in favor of an elegant Elf-crafted shield instead. The Sword master who specializes in this path will be the core that the lines of battle form around.
Path of Hoeth
The Path of Hoeth is for Sword masters who have spent much longer amounts of time in the White Tower, honing their innate magical skills and learning how to smoothly work magical power into their attacks. A Master of this path will learn subtle ways to both expose weaknesses in their foes, and to shield themselves in battle.
Important Stats
As a Swordmaster you will need the following statistics which you can improve using armor sets, weapons, rings, talismans and renown points.
Block: Increases your chance to defend against all attacks with a shield.
Wounds: Increases your overall HP. You can never have enough HP.
Toughness: Reduces damage dealt to you by opponents.
Parry: Increases your chance to defend against melee attacks.
Acquiring Gear
There are many ways to get gear:
- Open RvR: The gear and weapons you get here are for your main spec. When you kill or lock a zone you will be given a number of War Crests according to your level which you can trade for armor and weapons. At the end of a zone if you roll high enough you will be give a color bag with may contain certain tokens that you can trade and get a jewel set. Engineers don’t have defensive jewels set like other classes.
- Scenarios: Scenarios remain a very strong source of gear. You continue to earn War Crests at the end of every scenario, which are then traded with vendors in Altdorf (Order) or the Inevitable City (Destruction) for armor and weapons. The quality of gear from scenarios can still be among the best in the game, making them a crucial part of gearing up.
- Achievements & Tokens: The Tome of Knowledge is still a vital system. By completing achievements (e.g., killing a certain number of creatures, collecting specific items, or exploring areas), you unlock entries in your Tome. These unlocks can reward tokens that are then traded in the library in Altdorf or the Inevitable City for unique jewels or tactics. Some very desirable sets and bonuses can be acquired this way. The development team has continued to add more Tome Achievement Unlocks, including some tied to Live Events as of 2025.
- Tier 4 epic quests: The epic quest lines in each area continue to be a source of significant rewards. Upon completing these lengthy, multi-step quest chains, you are typically given a choice of a powerful item, often with unique appearances or stats. These quests are a reliable way to get high-quality gear.
- Dungeons & Lairs: Dungeons and lairs are still important for acquiring gear, weapons, and jewels, both while leveling up and for end-game progression. The RoR team has been actively updating and even adding new PvE content. For example, as of early 2025, there’s a “Lost Vale” dungeon update introducing new armor sets (Dark Promise sets, including main spec, off-spec, and hybrid options), and materials for crafting permanent rings.
- Ward System: The game utilizes a “Ward” system where you often need to unlock lower-tier Ward sets before being able to equip higher-tier dungeon gear (e.g., Gunbad -> City -> Bastion Stair).
- Public Quests (PQs): While not strictly “dungeons,” PQs are large-scale PvE events that can also provide gear through loot bags. RoR has implemented different difficulties for PQs (Easy, Normal, Hard) which scale with the recommended number of players and offer varying loot quality.
The Swordmaster: Elven Dance of Steel and Spirit
The Swordmaster of the High Elves in Warhammer Online: Return of Reckoning is a unique and formidable tank class, renowned for its elegant blend of protection, magical offense, and battlefield control. Unlike other tanks, the Swordmaster specializes in dealing magical damage, adding a distinct tactical layer to its presence in Realm vs. Realm (RVR) combat.
RVR Strengths: The Versatile Duelist
- Adaptability Across RVR Scales: The Swordmaster is a highly versatile tank, equally effective in all aspects of RVR. Whether navigating the intimate skirmishes of duos and 6v6 parties for roaming, scenarios, and ranked scenarios, or engaging in the massive clashes of 24-man warbands, the Swordmaster finds a welcomed and impactful role. This adaptability stems from their core tanking utilities combined with their unique offensive capabilities.
- Potent Hybrid Offense and Defense: While fulfilling the fundamental tanking duties of defending and protecting allies, the Swordmaster brings a significant offensive punch. They are front-line warriors specializing in magical attacks, utilizing elegant Blade Dances to string together short chains of attacks. Each swing of their weapon allows them to step into a more balanced fighting position, unlocking more powerful attacks and increasing their balance further. This isn’t just about personal damage; it means the Swordmaster can apply consistent pressure on enemy lines, forcing enemy healers to expend more resources and potentially breaking enemy formations.
- Superior 2-Handed DPS Output: As a 2-handed “DPS,” the Swordmaster boasts the best damage output of all Order 2-handed tanks, primarily due to the spirit damage they deal. This magical damage often bypasses the physical resistances common on many enemy tanks and melee classes, making them a highly efficient threat to a broader range of targets. This ability to dish out significant damage while maintaining tanking responsibilities makes them a highly attractive choice for players who enjoy an aggressive, proactive tanking style in RVR.
- Essential Tank Utility and Control: Regardless of their stance, Swordmasters possess all the critical tank utility skills:
- Guard: The ability to Guard a single ally and absorb 50% of their incoming damage, which can be blocked as a tank. Mastering Guard Switch is crucial for dynamic protection.
- Challenge: Reducing incoming damage for their party by 50%, a powerful defensive cooldown for burst situations.
- Crowd Control: A robust array of crowd control abilities such as Punt, Root, and Knockdown are at their disposal, enabling them to disrupt enemy plans, peel for their backline, or secure kills on priority targets. These CCs are vital for controlling the flow of RVR engagements.
Core Mechanics in RVR: Blade Dance and Spiritual Offense
- Blade Dance: The “Blade Dance” mechanic defines the Swordmaster’s combat flow. While complex to master, it rewards skillful play with increased offensive power and fluidity. Add-ons like “Plan-b” can assist players in optimizing this unique system, but ultimately, a proficient Swordmaster’s ability to maintain their Blade Dance translates directly into sustained pressure and burst damage in RVR. This complexity adds depth and a high skill ceiling to the class.
- Magical Damage Specialization: Their reliance on magical (Spirit) damage is a key differentiator in RVR. In a meta often dominated by physical damage, the Swordmaster’s magical output can catch opponents off guard and effectively bypass traditional physical defenses, making them particularly effective against heavily armored targets or those stacking physical resistance.
The Hybrid Playstyle: Maintaining the Protector Role
- Crucially, whether wielding a sword and board for maximum survivability or a 2-handed weapon for heightened offense, the Swordmaster never loses their fundamental “protector” role. All their tank utility skills, including Guard, remain available. This ensures that even when built for damage, they retain the core ability to protect allies and control the battlefield, fulfilling the essential duties of a tank within any RVR scenario.
In conclusion, the Swordmaster in Warhammer Online: Return of Reckoning is a dynamic and high-impact RVR tank. Their unique blend of magical damage, versatile utility, and the engaging Blade Dance mechanic make them a complex yet incredibly rewarding class to play. They are a welcome addition to any RVR group, capable of both protecting their allies and devastating their foes with elegant, spirit-infused strikes.
Warhammer Online: Return of Reckoning (RoR) offers a classic RvR (Realm vs. Realm) experience, and playing a tank effectively is crucial to your realm’s success. Tanks are the backbone of any group, soaking up damage, controlling the battlefield, and protecting their squishier allies. Here’s a guide to mastering the tank role in RoR:
The Core Philosophy of a RoR Tank
Unlike many modern MMOs where tanks primarily hold aggro through damage, RoR tanks excel at:
- Damage Mitigation: Directly reducing incoming damage to themselves and, more importantly, their allies.
- Crowd Control (CC): Disrupting enemy formations, preventing damage, and setting up kills for their DPS.
- Debuffing: Weakening enemies to make them easier for your allies to kill.
- Peeling: Protecting your healers and ranged DPS from enemy threats.
Essential Tank Skills and Their Usage
While specific skill names and effects vary slightly between the different tank careers (Knight of the Blazing Sun, Ironbreaker, Swordmaster for Order; Chosen, Black Orc, Black Guard for Destruction), the core mechanics and their application are similar.
1. Guard (Core Tank Mechanic)
- What it does: Guard is arguably the most important tank ability. When active on a groupmate within 30 feet, it transfers 50% of the damage they take and 35% of the hate they generate (in PvE) onto you.
- When it’s used:
- Always be guarding someone! This is non-negotiable. Your primary goal is to keep your squishier allies alive.
- Prioritize high-value targets: Generally, this means your healers first, then your high-DPS allies (especially ranged or caster DPS who are often targeted).
- Situational Switching:
- Emergency Peeling: If an enemy DPS suddenly switches onto one of your squishy allies who is taking heavy damage, quickly switch your Guard to them to absorb a significant portion of that damage.
- Focus Fire: If your group is trying to burn down a specific enemy, Guard the allied DPS who is focusing that target. This allows them to stay aggressive without fear of being instantly burst down.
- Objective Play: When guarding a flag or an important objective, you might guard a backline DPS or healer who is holding the point while you physically block incoming enemies.
- Example: Your Bright Wizard (BW) is getting focused by a Marauder and a Witch Elf. Your healer is busy healing the frontline. You immediately Guard the BW. Now, half the damage they take is transferred to you, allowing your healer to catch up or giving the BW a crucial window to escape or retaliate.
2. Taunts & Challenges (Threat & Damage Mitigation)
- Taunt (Single Target):
- What it does: Forces a single enemy to attack you and, in RoR, often increases the damage you deal to them for a short duration. It also interrupts currently building abilities.
- When it’s used:
- PvE Threat Management: In dungeons and open-world PvE, this is your primary way to keep a specific mob on you.
- PvP Interrupt & Focus: Use it on an enemy healer to interrupt a heal, or on a high-damage enemy to direct their attacks onto you, taking pressure off your allies. It can also be used to increase your damage output on a key target for your group to burst down.
- Challenge (AoE):
- What it does: Forces multiple enemies in front of you to attack you and reduces the damage they deal to anyone other than you.
- When it’s used:
- Frontline Engagements: In large-scale RvR (Realm vs. Realm) battles or scenarios, use Challenge when you’re engaging a group of enemies to reduce their overall damage output on your team. Tanks will often rotate their Challenges to keep enemies consistently under this effect.
- Objective Defense: When defending a keep door or a tight choke point, using Challenge on cooldown can significantly reduce incoming damage to your entire group.
- Example (PvP): A large enemy warband is pushing your keep door. As the primary tank, you charge in, hit your AoE Challenge, and then follow up with your single-target Taunt on their most dangerous melee DPS. This pulls their focus and reduces their damage on your squishy backline trying to hold the door.
3. Knockbacks & Knockdowns (Crowd Control)
- What they do: These abilities forcefully displace enemies, interrupting casts, creating space, and sometimes stunning them momentarily.
- When they’re used:
- Peeling: This is a crucial peeling tool. If an enemy melee DPS is on your healer, use a knockback to send them flying, giving your healer precious time to reposition or heal themselves.
- Environmental Kills: RoR has many ledges and cliffs. Punting an enemy off a cliff for an instant kill is incredibly satisfying and effective.
- Interrupting Important Casts: While Taunt can interrupt, a well-timed knockback can disrupt a critical channeled ability or powerful cast from an enemy.
- Isolating Targets: Knocking an enemy tank away from their guarded target can create a window for your DPS to quickly burst down a squishy enemy.
- Example: You see an enemy Bright Wizard starting to cast a powerful AoE nuke. You quickly use your knockback ability to send them flying, interrupting their cast and potentially saving your group from massive damage.
4. Defensive Buffs (Self & Group Survival)
- What they do: These skills vary by tank class but typically involve increasing your armor, resistances, parry/block/disrupt chances, or granting temporary invulnerabilities. Some also provide group-wide defensive bonuses.
- When they’re used:
- Anticipate Burst: Use your defensive cooldowns before you take heavy damage, not after. If you see an enemy group focusing you, pop your defensive buffs.
- Mitigate AoE Damage: Abilities like the Knight of the Blazing Sun’s “Hold the Line!” increase dodge and disrupt for allies behind you, making them excellent for defending against ranged and magical attacks in group engagements.
- Objective Holding: When defending a flag or a bottleneck, using your group defensive buffs can make your team significantly tougher to dislodge.
- Example: You’re leading a charge into a crowded area in RvR. You anticipate incoming ranged and magic damage, so you activate a defensive buff like “Hold the Line!” (if you’re a KotBS) to bolster your allies’ defenses as you push in.
5. Debuffs (Weakening Enemies)
- What they do: Tanks often have abilities that reduce enemy armor, damage, healing received, or apply snares/roots.
- When they’re used:
- Focus Fire Enhancement: Apply armor or resistance debuffs to the enemy target your group is focusing, helping your DPS melt them faster.
- Controlling Movement: Snares and roots are excellent for preventing enemies from escaping or reaching your backline.
- Damage Reduction: Debuffs that reduce enemy damage output can significantly ease the burden on your healers.
- Example: You’ve successfully taunted and guarded your healer, drawing the attention of an enemy Chosen. You then apply an armor debuff to the Chosen, allowing your allied DPS to chew through their defenses more effectively. If the Chosen tries to run, you follow up with a snare to keep them in range.
General Tanking Principles
- Map Awareness: Always be aware of your surroundings, where your allies are, and where the enemy threats are coming from. This dictates who you Guard, who you CC, and where you position yourself.
- Positioning is Key:
- Protect the Backline: Position yourself between your healers/ranged DPS and the incoming enemy threats. Be a physical barrier.
- Control Choke Points: Tanks excel at holding narrow passages or doorways, preventing enemy pushes.
- Initiate & Absorb: Be the first one into a fight to absorb the initial burst and draw aggro.
- Communication: Call out targets, communicate your cooldowns, and inform your healers if you’re taking heavy damage.
- Adaptability: No two fights are exactly alike. Be prepared to switch your Guard target, adjust your positioning, and prioritize different CC based on the flow of battle.
- Renown Skills: Invest your Renown points wisely into defensive stats like Toughness, Wounds, and parry/block/disrupt. Renown abilities like “Stand Your Ground” (increased incoming healing) or “Juggernaut” (temporary CC immunity) are incredibly valuable.
- Potions: Always carry healing and defensive potions. They can provide a crucial burst of survivability in dire situations.
By understanding and effectively utilizing these core skills and principles, you’ll be well on your way to becoming an invaluable tank in Warhammer Online: Return of Reckoning, leading your realm to victory on the battlefield!
Pre Best in Slot Gear (Shield & Sword)
|
|||
| Helmet: | Redeye Set | ||
| Shoulders: | Redeye Set | ||
| Cloak: | Redeye Set | ||
| Chest: | Redeye Set | ||
| Belt: | Vanquisher Set | ||
| Gloves: | Vanquisher Set | ||
| Boots: | Vanquisher Set | ||
| Mainhand: | War Crest Vendor with Sentr’s Prefix | ||
| Offhand: | War Crest Vendor with Sheildbearer’s Prefix | ||
| Jewelry Slot 1: | Rough Gunbad Diamond | ||
| Jewelry Slot 2: | Rough Gunbad Ruby | ||
| Jewelry Slot 3: | Genesis Fragment of the Everlasting | ||
| Jewelry Slot 4: | Genesis Fragment of the Undying | ||
| Talisman: | Initiative & Wounds | ||
Best in Slot Gear (Shield & Sword)
|
|||
| Helmet: | Defensive Sovereign Set | ||
| Shoulders: | Defensive Sovereign Set | ||
| Cloak: | Defensive Sovereign Set | ||
| Chest: | Defensive Sovereign Set | ||
| Belt: | Defensive Sovereign Set | ||
| Gloves: | Defensive Sovereign Set | ||
| Boots: | Defensive Sovereign Set | ||
| Mainhand: | Shieldbearer’s Pavise of Reverence | ||
| Offhand: | Sentry’s Blade of Reverence | ||
| Jewelry Slot 1: | Genesis Remnantof the Everlasting | ||
| Jewelry Slot 2: | Genesis Fragment of the Everlasting | ||
| Jewelry Slot 3: | Genesis Fragment of the Undying | ||
| Jewelry Slot 4: | Genesis Fragment of the Warrior | ||
| Talisman: | Initiative & Wounds | ||
Pre Best in Slot Gear (2Handed)
|
|||
| Helmet: | Sentinel Set | ||
| Shoulders: | Bloodlord Set | ||
| Cloak: | Sentinel Set | ||
| Chest: | Bloodlord Set | ||
| Belt: | Bloodlord Set | ||
| Gloves: | Sentinel Set | ||
| Boots: | Sentinel Set | ||
| Mainhand: | War Crest Vendor with Titan’s Prefix | ||
| Offhand: | |||
| Jewelry Slot 1: | Rough Gunbad Ruby | ||
| Jewelry Slot 2: | Genesis Fragment of the Undying | ||
| Jewelry Slot 3: | Genesis Fragment of the Warrior | ||
| Jewelry Slot 4: | Anything | ||
| Talisman: | Initiative & Wounds | ||
Best in Slot Gear (2Handed)
|
|||
| Helmet: | Offensive Sovereign | ||
| Shoulders: | Offensive Sovereign | ||
| Cloak: | Victorious Set | ||
| Chest: | Offensive Sovereign | ||
| Belt: | Offensive Sovereign | ||
| Gloves: | Offensive Sovereign | ||
| Boots: | Victorious Set | ||
| Mainhand: | Fortress GreatSword | ||
| Offhand: | |||
| Jewelry Slot 1: | Genesis Fragment of the Undying | ||
| Jewelry Slot 2: | Genesis Fragment of the Warrior | ||
| Jewelry Slot 3: | Victorious Set | ||
| Jewelry Slot 4: | Offensive Sovereign | ||
| Talisman: | Initiative & Wounds | ||

Tharun Ankor
[EU] Dwarf Only – RvR & Roleplay Guild – Tharûn Ankor Tharûn Ankor is recruiting both new and veteran Dawi to strengthen our ranks. Currently recruiting: • Ironbreakers • Slayers • Rune Priests • Engineers What we offer: • Organized RvR warbands & guild groups • Dungeon runs and progression help • Friendly international community [...]
Vulkan – Frame Rate
One of the most important recent find, by Xpander. Basically, this modern and customized API wrap your game with a lot more stable components. Download DXVK from here. Locate latest dxvk.tar.gz Then extract D3D9.dll (from 32x folder) into your Warhammer Online folder. Now add my little configuration file here, then place it into your Warhammer [...]

Tank Ironbreaker Build (Stonebeard)
Sword and Board Build: A solid build that can take on almost every destruction. Spent you ability points as shown below: Path of Vengeance 6 points / Path of Stone 17 Points / Path of Brotherhood 6 Points Pick the following morals: Pick the following tactics: Spend your renown points as shown below: Gear: Helmet: Triumphant Greathelm Shoulders: [...]
Sword & Board: Ironbreaker (Unkillable)
Shield and Board Build: A solid build that can take on almost every destruction. A mix of Offensive and defensive gear to make you tank enough for solo and Warband game play while allowing you to kill almost any class in the game once geared up. Spent you ability points as shown below: Path of [...]
2 Handed Ironbreaker DPS – (Healing Debuff)
2 Handed IronBreaker Build: A solid build that can take on almost every destruction. Open up with inspiring attack. Then use your dots to do damage. Grudge-born fury to get your grudges up fast. At 100 grudges, that skill does a lot of damage. When fighting tanks, use this a lot. De buffs you need [...]
2 Handed Ironbreaker (DPS)
2 Handed IronBreaker Build: A solid build that can take on almost every destruction. Open up with inspiring attack. Then use your dots to do damage. Grudge-born fury to get your grudges up fast. At 100 grudges, that skill does a lot of damage. When fighting tanks, use this a lot. De buffs you need [...]
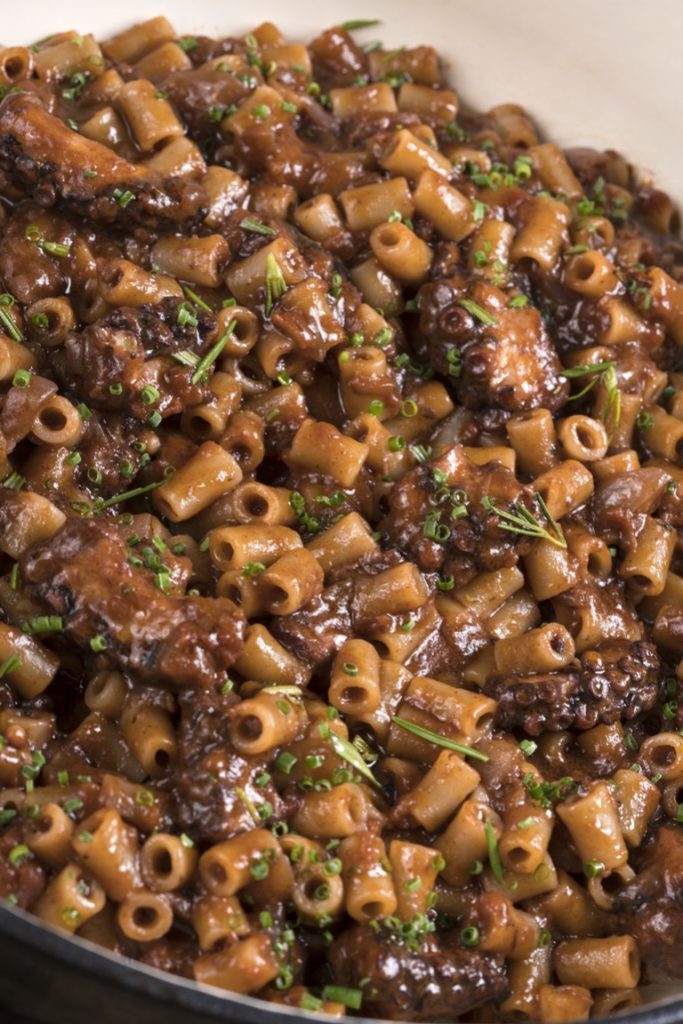
Greek octopus mac and cheese
Greek octopus mac and cheese Cooking POt 1 onion (dry) 6 tablespoon (s olive oil) 1 kilo octopus (washed and cleaned) 1 tablespoon (s tomato paste) 25 ml ouzo 400 g canned tomatoes 1 1/2 liter stock (vegetable) 2 bay leaves 500 g macaroni salt pepper Place a large pot over medium heat. Peel the [...]
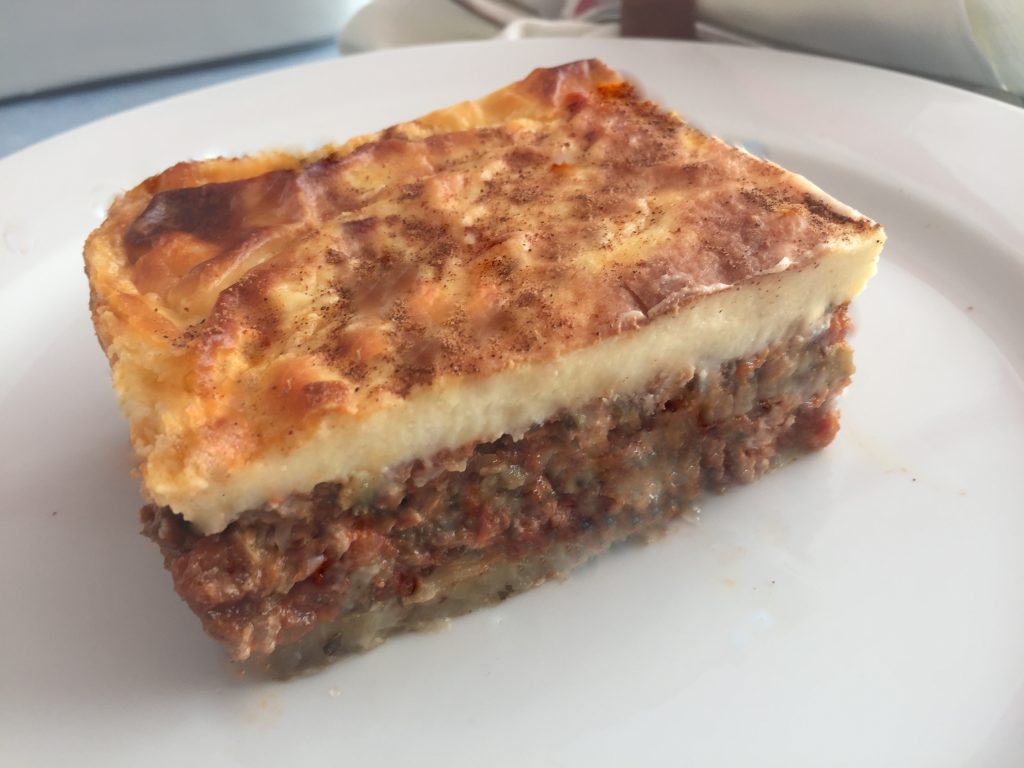
Greek Moussaka
Greek Moussaka Eggplant minced meat potato bechamel Cooking Pots Backing Tray Bowl hand Mixer 3 items Potatoes 2 Items Eggplant Salt Pepper For the meat sauce Olive oil 1 onion 2 tablespoon (s olive oil, for sautéing) 1 clove (s of garlic) 3 pinches granulated sugar 1/2 teaspoon (s ground cloves) 1 level teaspoon (s [...]
FixxerTV’s Marksman (Sniper) Build
Great Burst Build for Single Target Kills Spent you ability points as shown below: Path of Rifleman 17 points / Path of Grenadier 0 Points / Path of Tinkerer 12 Points Pick the following morals: Pick the following tactics: Can replace Co - ordinated Fire with tracer Rounds Spend your renown points as shown below: Gear Sets [...]
FixxerTV’s Grenadier Build
A High DPS build with great survivability Spent you ability points as shown below: Path of Marksman 0 points / Path of Grenadier 17 Points / Path of Tinkerer 12 Points Pick the following morals: Pick the following tactics: Spend your renown points as shown below: (Recommended) Spend your renown points as shown below: (Alternative) Gear: [...]