Talismans
4 x 23 (or better) Wounds for ~1001 Wounds total and
4 x 23 (or better) Initiative talismans
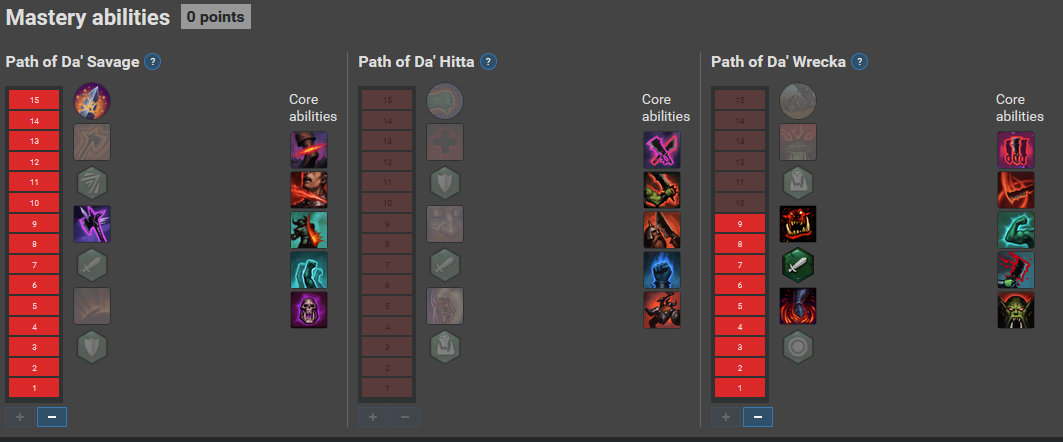
You lower your AOE damage slightly and lose your 2nd channel, but you gain access to the best damaging Morale in the game.
Recommended if you are in a Morale Pump Party (Shaman in the party with double Morale pump tactics) or if your warband/group is mainly kiting and engaging only in opportune moments.
Feel free to ask your warband leader if they want to form a Morale Pump party if all the necessary classes are available (Shaman, MSH, BO, Choppa).
Morale Build specifics
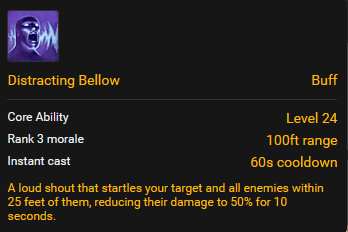
You are by default giving a noticeable portion of your damage output (~5%) and losing the GTDC channel in order to acquire the Left tree Morale 4 ability. This is a worthy trade-off due to how amazing that Morale is.
Since it affects all attacks for all teammates you can expect that both mdps in the party could hit an enemy around 8 times each in those 10 seconds for a whopping extra 4800 morale damage (if we ignore the morale damage softcap). Compared to other AOE M4s dealing 2400 damage you can quickly see how good this M4 is. Especially when the tanks and healers could also potentially pitch in for extra pressure.
To utilize this build to the fullest, there are ways to get to the M4 consistently and decently fast, that can make it worth it. These involve one or both of the following:
- Warband with a kiting playstyle → staying in combat for a long as possible while throwing daggers from range/allowing yourself to be dotted up → reaching M4 before the warband actually goes in for the kills
- Increasing your Moral gain rate → reaching M4 faster → less time in combat needed to put it to use
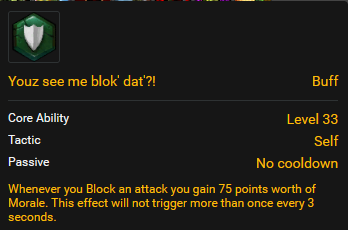
While the first one isn’t always under your control (depends on they playstyle of the wb leader), the Morale gain rate increase can be more easily achieved:
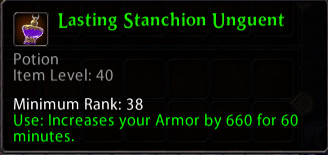
So with it your actual gain rate is 21 M/s.
In a Morale Pump Party you also have a Shaman that’s running both Ere’ We Go tactics:
So let’s see how fast we can get to M4:
| Build | Gain rate (M / second) |
Time to reach M4 (seconds) |
| Normal | 21 | 172 |
| Normal + Morale Pump Shammy | 41 | 88 |
To put it into perspective, you’ll find most warbands willing to push once they have access to M2, which normally happens at 36 seconds in combat.
M3 is usually reached at around 90 seconds, so a Morale Pump Party reaching M4 in that time is actually quite good.
But it can get better. Here are the upgrades you can do to your builds in order to get more Morale gain/s as well as how much damage you lose for them (roughly):
1. (For the pre-BIS and BIS build; Sov-Tri 4-4 and 5-4)
Swap out the Sov Chest and Triumphant Boots
for Triumphant Chest and Sov Boots:You lose 25 WS, 1 AP/s and 10% AA Haste
but gain 3 Morale/s, 5 STR, 1% Dodge, 2% DisruptThe AA Haste loss is not that important for orvr (where you focus on AOE damage) but the less WS loss will result in about 1% damage loss.
It does cost 2433 to buy both though, so you might consider going for it directly (see Sovereign of da Berserker – Triumphant 5-4 (rr78) transition to BIS options in the intro) instead of the Sov Chest + Trium Boots if you plan on playing with this build (before going for the 9999 Triumphant Ring)
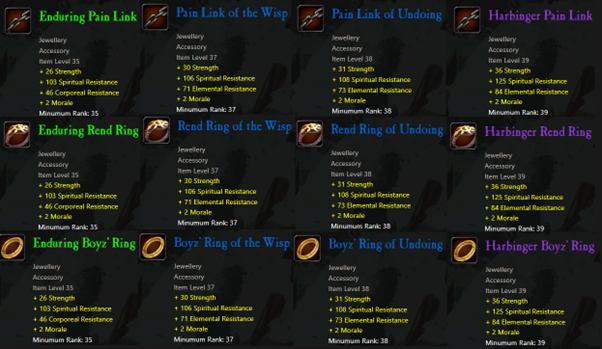
a.The Boundless Rings
These offer a nice 32 STR while also providing a big amount of the 2 most important resist types. Specifically looking out for Corporeal and Elemental resistances here, since those are the main sources of BW and Engi AOE damage.
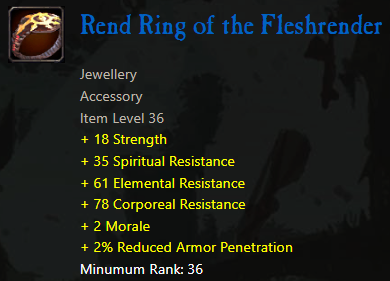
b.Rend Ring of the FleshrenderOnly 1 version here, but it’s a great one; despite having only 18 STR on it, it offers a good amount of Elemental and Corporeal resists, some Spiritual too, and most importantly 2% reduced armor pen.
Reduced armor pen is the most important defensive stat in the game in mitigating physical damage and having 2 of them for a total of 4% redarpen means you will be taking around5% less physical damage. Great option especially for Kiting playstyle.
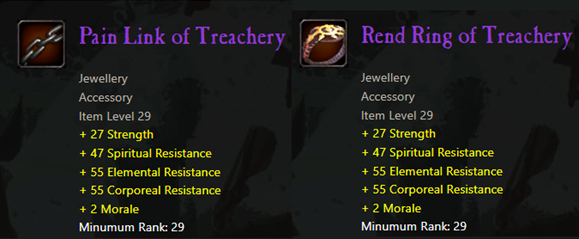
c.Treachery RingsThese offer a bit less STR and Corporeal/Elemental resistances than the Boundless Rings, but a bit more STR than the Fleshrender ones. While I would recommend any of the above options, these rings are also an option in case the other stuff is not available/too expensive at the AH.
d.The rest of the Morale ringsNone of them are particularly great options due to providing 0 Corporeal resistances. They are, however, an option if you wanna increase your Morale gain at the cost of both damage and survivability. The Enduring rings in particular should be cheap to buy/easy to farm/drop.
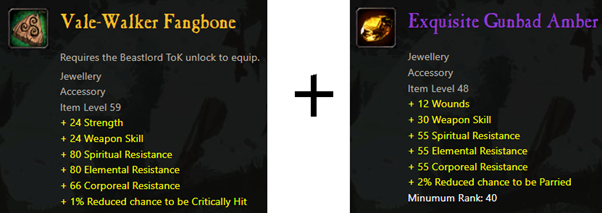
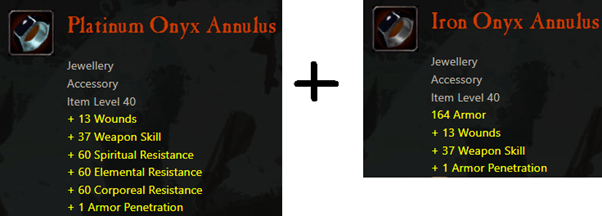
| Ring | Dmg% loss vs VW + Exq. GB | Dmg% loss vs 2 x Onyx |
| 2 x Boundless | 1.3% | 4.2% |
| 2 x Fleshrender | 2.3% | 5.2% |
| 2 x Treachery | 1.6% | 4.6% |
You can see how the Fleshrender rings don’t really drop your damage too much compared to the other options (0.5% – 1% more) while also providing you with 4% reduced armor pen. The Boundless rings are also a great option due to having the best offensive stats and the best resistances.
Overall we can summarize using 2 x Morale Jewelries as a
4 Morale/second gain accompanied with a 1.5% (4.5%) damage loss compared to the low-end (high-end) BIS jewelries.
2.Overworld Drop weapons with Morale gain
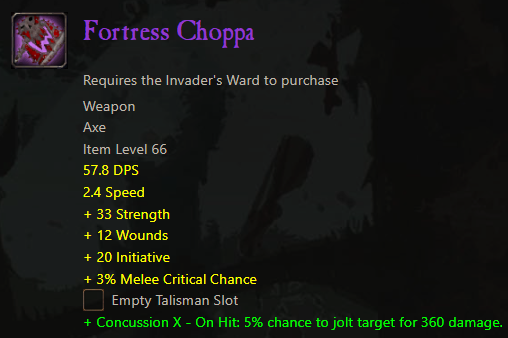
- Overworld Drop weapons with Morale gain. Not many options here and they are all very similar. Similar to the rings, the enervating one should be cheap to buy/easy to farm/drop.They’ll be replacing:
Here it’s difficult to quantify the damage loss, both due to the proc on the Fortress weapon, but also due to the crit% loss. Below are my best estimates:
| Choppa | Dmg% loss vs Fortress Choppa |
| Harrier | 3.3% |
| Brigand’s | 4.5% |
| Enervating | 5% |
So here we are getting a 3 Morale/second gain accompanied with a 3.3% – 5% damage loss.
I won’t give you the answer for how much of the above you use, since that depends on personal preferences. I will just list the time to reach M4 with all the possible combinations of the above, with and without Shaman Morale pump and the estimated damage loss compared to the normal build (accounting from mastery point damage loss and item stat loss)
| Build | Gain rate (M / second) |
Time to reach M4 (seconds) | Total dmg loss compared to Morale build (estimated) |
| Normal | 21 | 172 | 5% |
| Sov_Boots | 24 | 150 | 6% |
| Sov_Boots + 2xJewelry | 28 | 129 | 7.4% (10.2% if you compare to 2x Annulus) |
| Sov_Boots +2xJewelry + Morale_Weapon | 31 | 117 | 11.1% (13.7% if you compare to 2x Annulus) |
| Normal + Morale Pump Shammy (MPS) | 41 | 88 | 5% |
| MPS + Sov_Boots |
44 | 82 | 6% |
| MPS + Sov_Boots + 2xJewelry |
48 | 75 | 7.4% (10.2% if you compare to 2x Annulus) |
| MPS + Sov_Boots + 2xJewelry + Morale_Weapon |
51 | 71 | 11.1% (13.7% if you compare to 2x Annulus) |
Once again reminding that you’ll find most warbands willing to push once they have access to M2, which normally happens at 36 seconds in combat while M3 is usually reached at around 90 seconds.
